
🚀 FastAPI MCP 服务器
About
# 🚀 FastAPI MCP 服务器    FastAPI MCP服务器是一个专为大型语言模型设计的Model Context Protocol (MCP) 集成应用,基于FastAPI框架开发,提供高性能的服务器端事件(SSE)通信、智能工具注册和完善的会话管理功能。 ## 📖 项目简介…
Explore
- Integrates FastAPI’s high performance with the MCP protocol
- Efficient SSE-based real-time communication with millisecond latency
- Multi-user session isolation for data separation
- Flexible authentication via token, path, or query parameters
- Fully asynchronous architecture supporting high concurrency
- Intelligent tool registration system to extend model capabilities

Setting up with Highlight
This MCP is not yet compatible with Highlight’s one-click setup. However, you can still use it with Highlight by following these steps:
- Download and install Highlight from highlightai.com/download
- Navigate to the plugins tab and select "Add Custom Plugin"
-
Configure the plugin with the settings below
Plugin Name
🚀 FastAPI MCP 服务器Command (node, npx, python, etc.)Please refer to the README for specific instructions on how to obtain API keys or other required environment variables.
- Enable "Start Automatically" if you want the plugin to start when Highlight launches





From the repository
Install Python 3.13+ and optionally uv. Clone the repository, create a virtual environment, and install dependencies with pip install -e .. Configure environment variables in a .env file and create the database file database/session.db. Start the server with python -m main or start. It runs by default on http://localhost:8000. Custom tool functions can be added in the tools/ directory and registered in server.py.
Claude Desktop / Cursor
Paste into your MCP client config file to install this server.
{
    "mcpServers": {
        "\ud83d\ude80 fastapi mcp \u670d\u52a1\u5668": {
            "fastapi-mcp-server": {
                "command": "python",
                "args": [
                    "-m",
                    "venv",
                    ".venv"
                ]
            }
        }
    }
}McpServers
{
    "fastapi-mcp-server": {
        "command": "python",
        "args": [
            "-m",
            "venv",
            ".venv"
        ]
    }
}


FastAPI MCP服务器是一个专为大型语言模型设计的Model Context Protocol (MCP) 集成应用,基于FastAPI框架开发,提供高性能的服务器端事件(SSE)通信、智能工具注册和完善的会话管理功能。
📖 项目简介
此项目是一个轻量级、高性能的MCP服务器实现,旨在简化AI模型与用户应用程序之间的交互。它利用FastAPI的异步特性和Schema验证能力,结合SSE(Server-Sent Events)技术实现低延迟的实时通信,并通过会话管理系统支持多用户、多模型并发交互,为开发AI驱动的应用提供强大后端支持。
✨ 项目亮点
- 🔄 FastAPI + MCP整合:将FastAPI的高性能与MCP协议无缝集成,提供标准化的模型交互接口
- 📡 高效SSE实时通信:基于服务器发送事件(SSE)实现毫秒级响应的单向实时数据流
- 👥 多用户会话隔离:完善的会话创建、存储和管理机制,确保多用户场景下的数据隔离
- 🔐 灵活认证机制:支持多种认证方式,包括token、path和query参数,满足不同场景需求
- ⚡ 全异步处理架构:从请求处理到数据库操作均采用异步设计,支持高并发访问
- 🧰 智能工具注册系统:简化AI工具函数的注册和管理,便于扩展模型能力
🔍 工作原理
graph TD
    A[客户端] -->|发送请求| B[FastAPI服务器]
    B -->|创建/获取| C[会话服务]
    C -->|管理| D[用户会话]
    B -->|路由到| E[MCP处理器]
    E -->|注册| F[工具函数]
    E -->|使用| G[SSE传输]
    G -->|实时响应| A

    classDef client fill:#f9f,stroke:#333,stroke-width:2px;
    classDef server fill:#bbf,stroke:#333,stroke-width:2px;
    classDef service fill:#bfb,stroke:#333,stroke-width:2px;

    class A client;
    class B,E server;
    class C,D,F,G service;
📸 屏幕截图
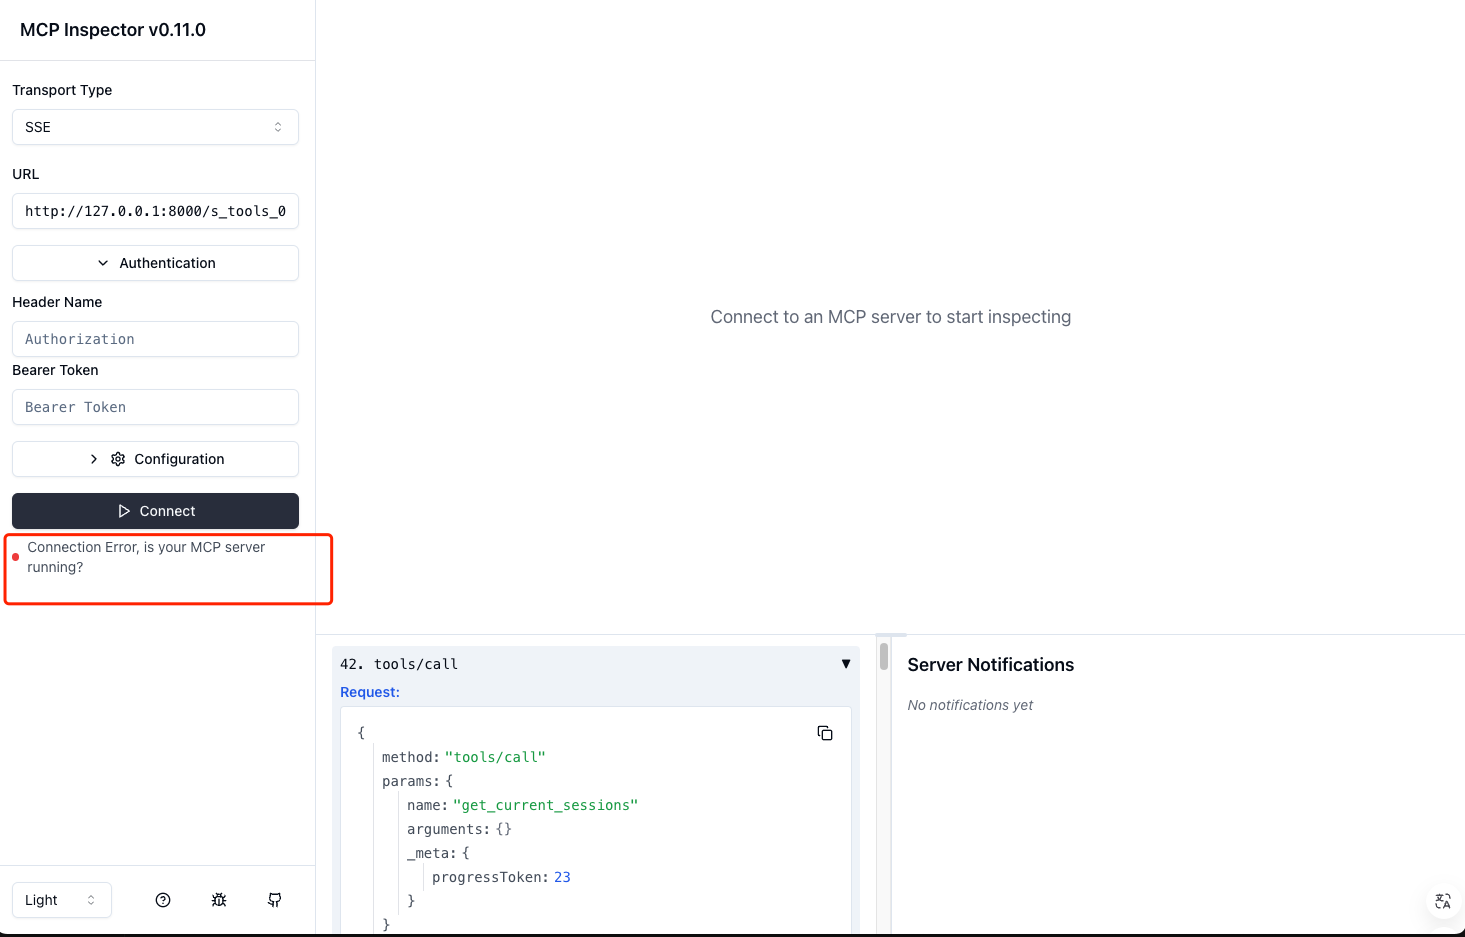
MCP交互界面
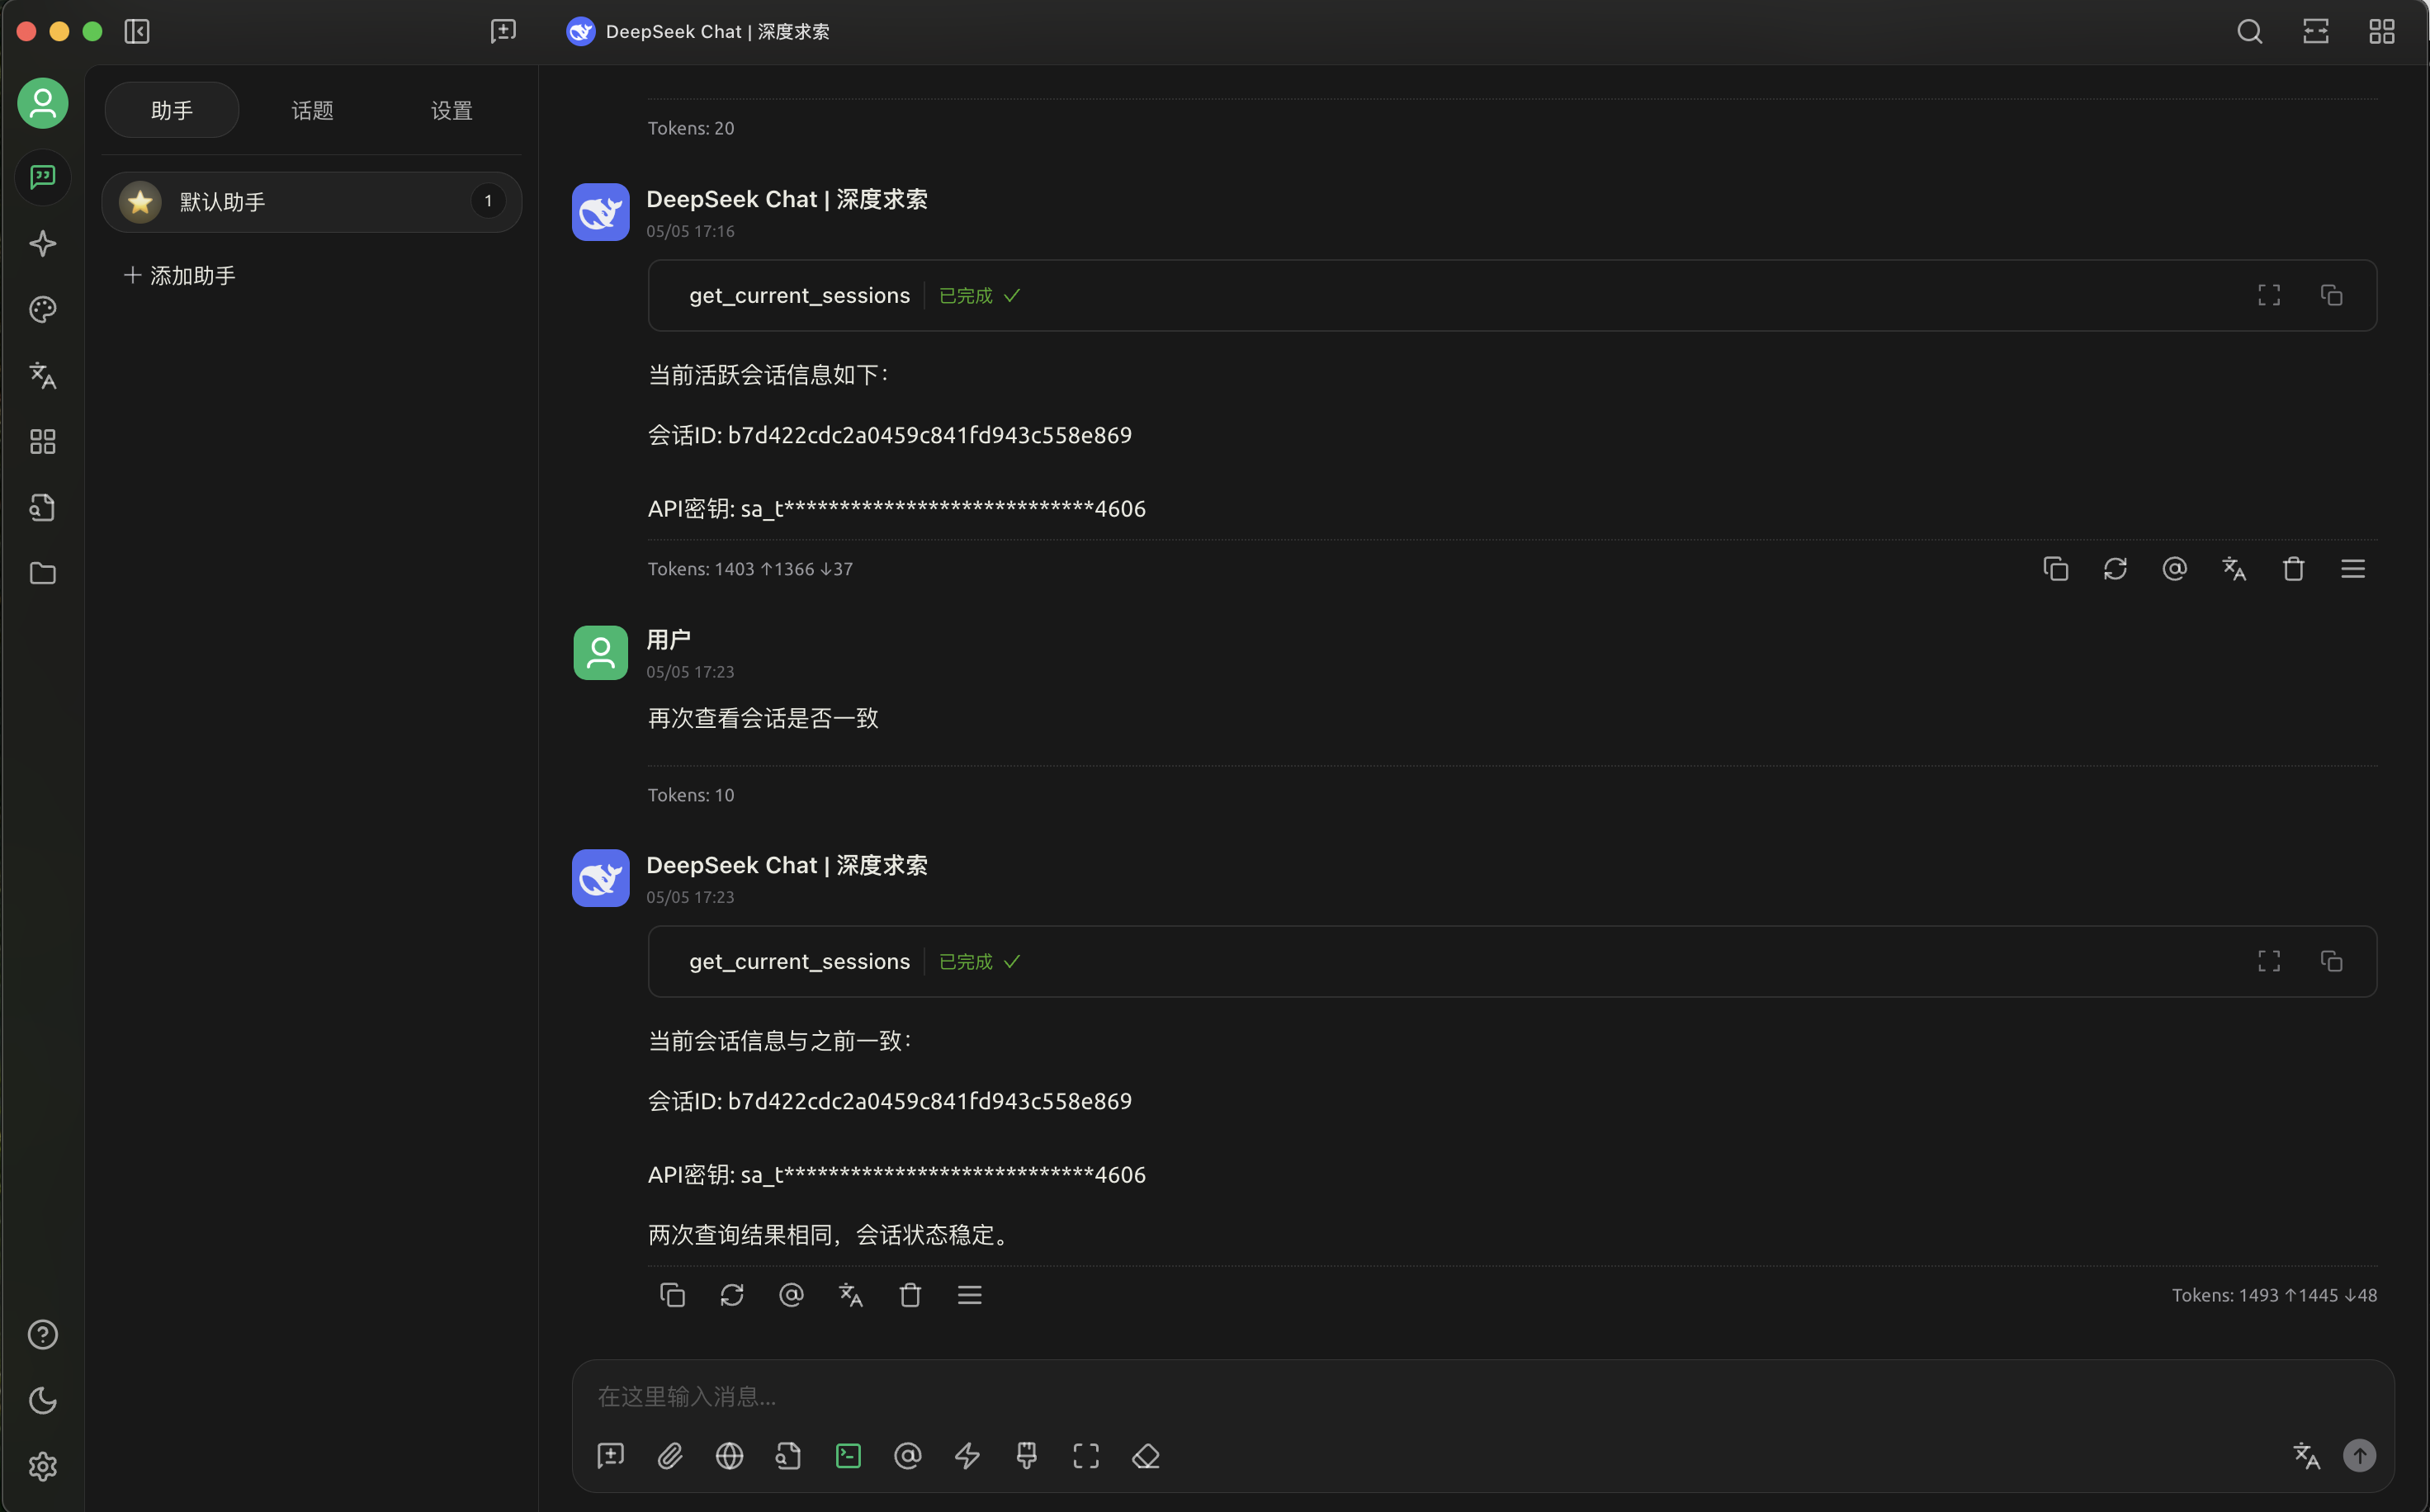
MCP Inspector参数无感透传
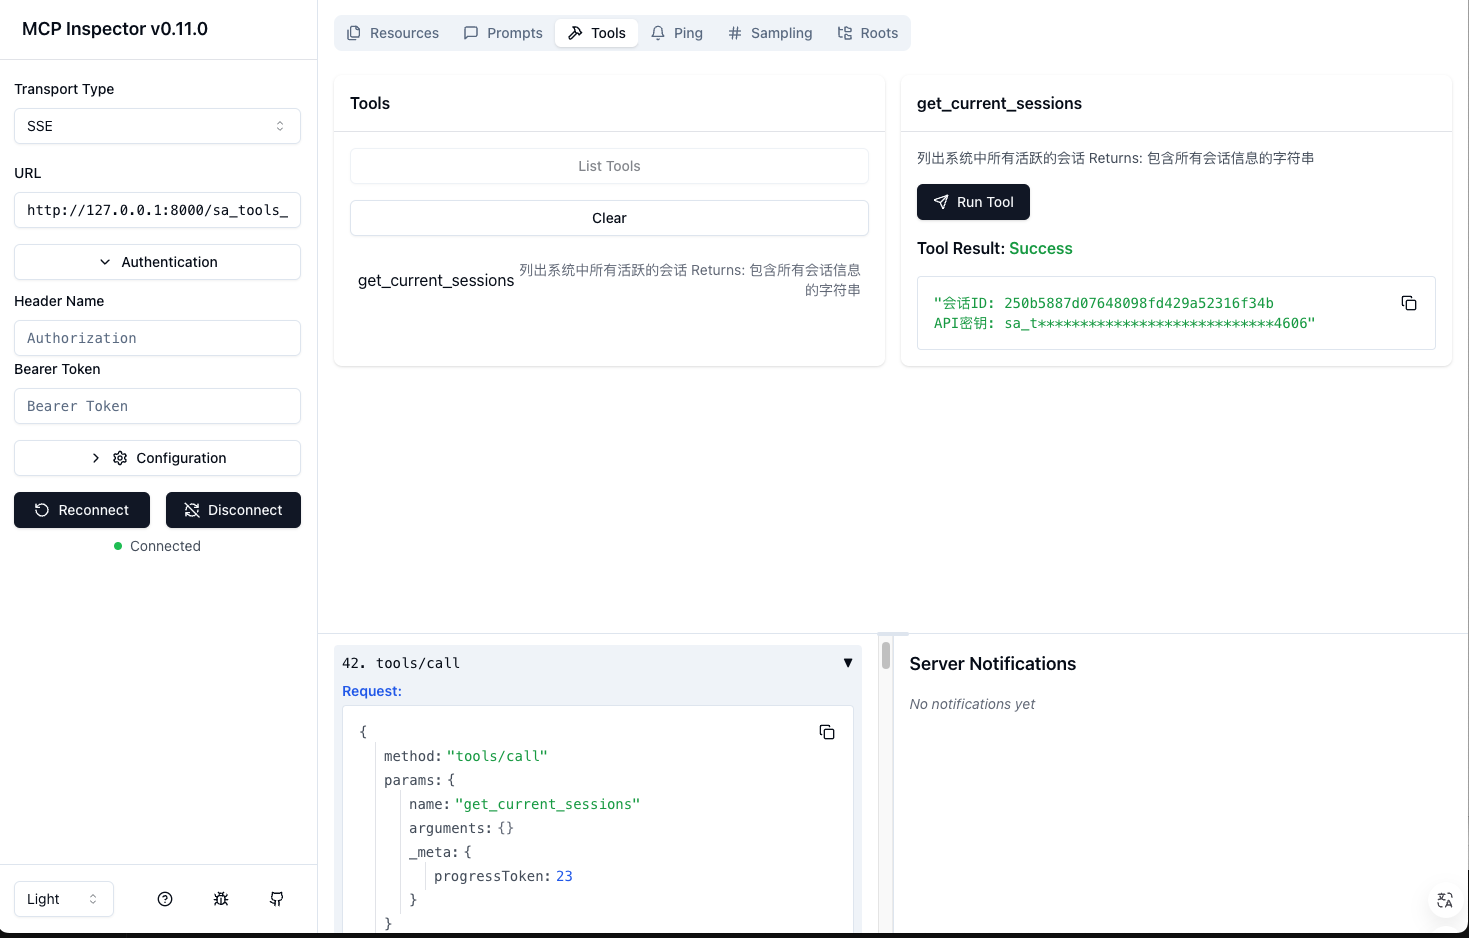
MCP Inspector参数鉴权校验
📁 项目结构
fastapi-mcp-server/
├── auth/               # 认证相关模块
├── database/           # 数据库连接和管理
├── models/             # 数据模型定义
├── routes/             # API路由定义
├── services/           # 业务逻辑服务
├── tools/              # 工具函数
├── transport/          # 传输层实现
├── utils/              # 通用工具函数
├── config.py           # 配置文件
├── main.py             # 应用入口
└── server.py           # MCP服务器初始化
🛠️ 安装指南
前置条件
- 🐍 Python 3.13+
- 🗄️ 支持异步的数据库(可选)
- 📦 uv包管理器(推荐)
安装步骤
1. 克隆代码库:
git clone [email protected]:purity3/fastapi-mcp-server.git
cd fastapi-mcp-server
2. 创建并激活虚拟环境:
```bash
python -m venv .venv
source .venv/bin/activate # Linux/Mac
Sign in to leave a review
Use Google, GitHub, or an email account so ratings stay tied to real people.
No reviews posted yet.



