Fused UDF
About
Python-based framework for connecting Claude and other LLMs to executable Python code through User Defined Functions, enabling data scientists to extend their models with custom Python capabilities.
Details
- Repository
- fusedio/fused-mcp
- License
- MIT
Explore

Setting up with Highlight
This MCP is not yet compatible with Highlight’s one-click setup. However, you can still use it with Highlight by following these steps:
- Download and install Highlight from highlightai.com/download
- Navigate to the plugins tab and select "Add Custom Plugin"
-
Configure the plugin with the settings below
Plugin Name
Fused UDFCommand (node, npx, python, etc.)uvArguments-
Argument 1
...
Please refer to the README for specific instructions on how to obtain API keys or other required environment variables.
-
Argument 1
- Enable "Start Automatically" if you want the plugin to start when Highlight launches





From the repository
- Python 3.11
- Latest Claude Desktop app installed (macOS & Windows)
If you're on Linux, the desktop app isn't available so we've made a simple client you can use to have it running locally too!
You do _not_ need a Fused account to do any of this! All of this will be running on your local machine.
Claude Desktop / Cursor
Paste into your MCP client config file to install this server.
{
    "mcpServers": {
        "fused udf": {
            "env": {},
            "args": [
                "..."
            ],
            "command": "uv"
        }
    }
}Linux
{
    "env": {
        "ANTHROPIC_API_KEY": "your-key-here"
    },
    "args": [
        "..."
    ],
    "command": "uv"
}
Macos
{
    "env": [],
    "args": [
        "..."
    ],
    "command": "uv"
}
Windows
{
    "env": [],
    "args": [
        "..."
    ],
    "command": "uv"
}
<h1 align="center">
Fused MCP Agents: Setting up MCP Servers for Data
</h1>
<p align="center">
<a href="/LICENSE" target="_blank">


</p>
<p align="center">
<a
href="https://docs.fused.io/"
target="_blank"
><b>Documentation</b></a> 🌪️
<a
href="https://docs.fused.io/blog/announcing-fused-ai-builder/"
target="_blank"
><b>Read the announcement</b>
</a> 🔥
<a
href="https://discord.com/invite/Eryz9P2DeY"
target="_blank"
>
<b>Join Discord</b>
</a>
</p>
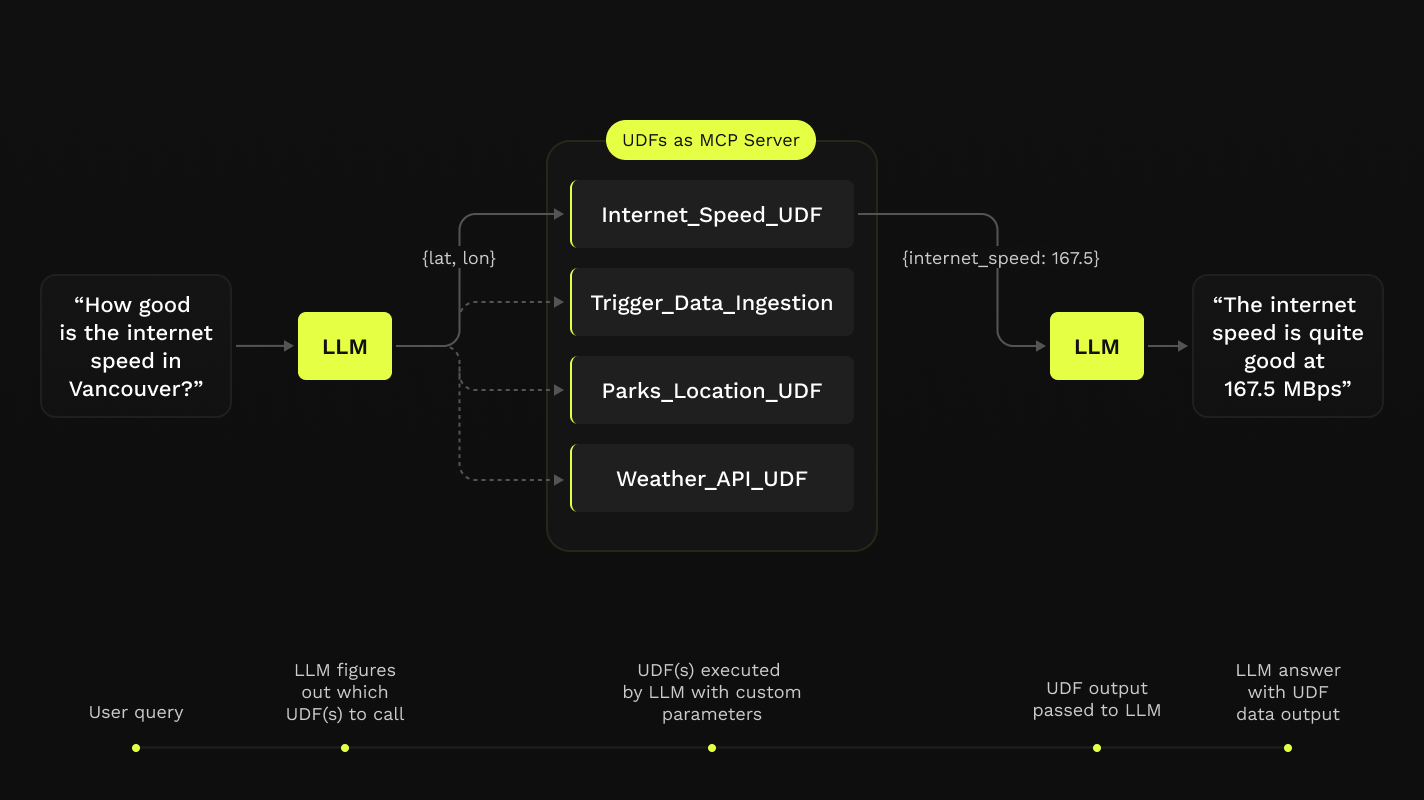
MCP servers allow LLMs like Claude to make HTTP requests, connecting them to APIs & executable code. We built this repo for ourselves & anyone working with data to easily pass _any_ Python code directly to your own desktop Claude app.
<h1 align="center">
<a
target="_blank"
href="https://fused.io"
>
</a>
</h1>
This repo offers a simple step-by-step notebook workflow to setup MCP Servers with Claude's Desktop App, all in Python built on top of Fused User Defined Functions (UDFs).

Requirements
- Python 3.11 - Latest Claude Desktop app installed (macOS & Windows)If you're on Linux, the desktop app isn't available so we've made a simple client you can use to have it running locally too!
You do _not_ need a Fused account to do any of this! All of this will be running on your local machine.
Installation
- Clone this repo in any local directory, and navigate to the repo:
  git clone https://github.com/fusedio/fused-mcp.git
  cd fused-mcp/
- Install uv
if you don't have it:
macOS / Linux:
curl -LsSf https://astral.sh/uv/install.sh | sh
Windows:
powershell -ExecutionPolicy ByPass -c "irm https://astral.sh/uv/install.ps1 | iex"
- Test out the client by asking for its info:
uv run main.py -h
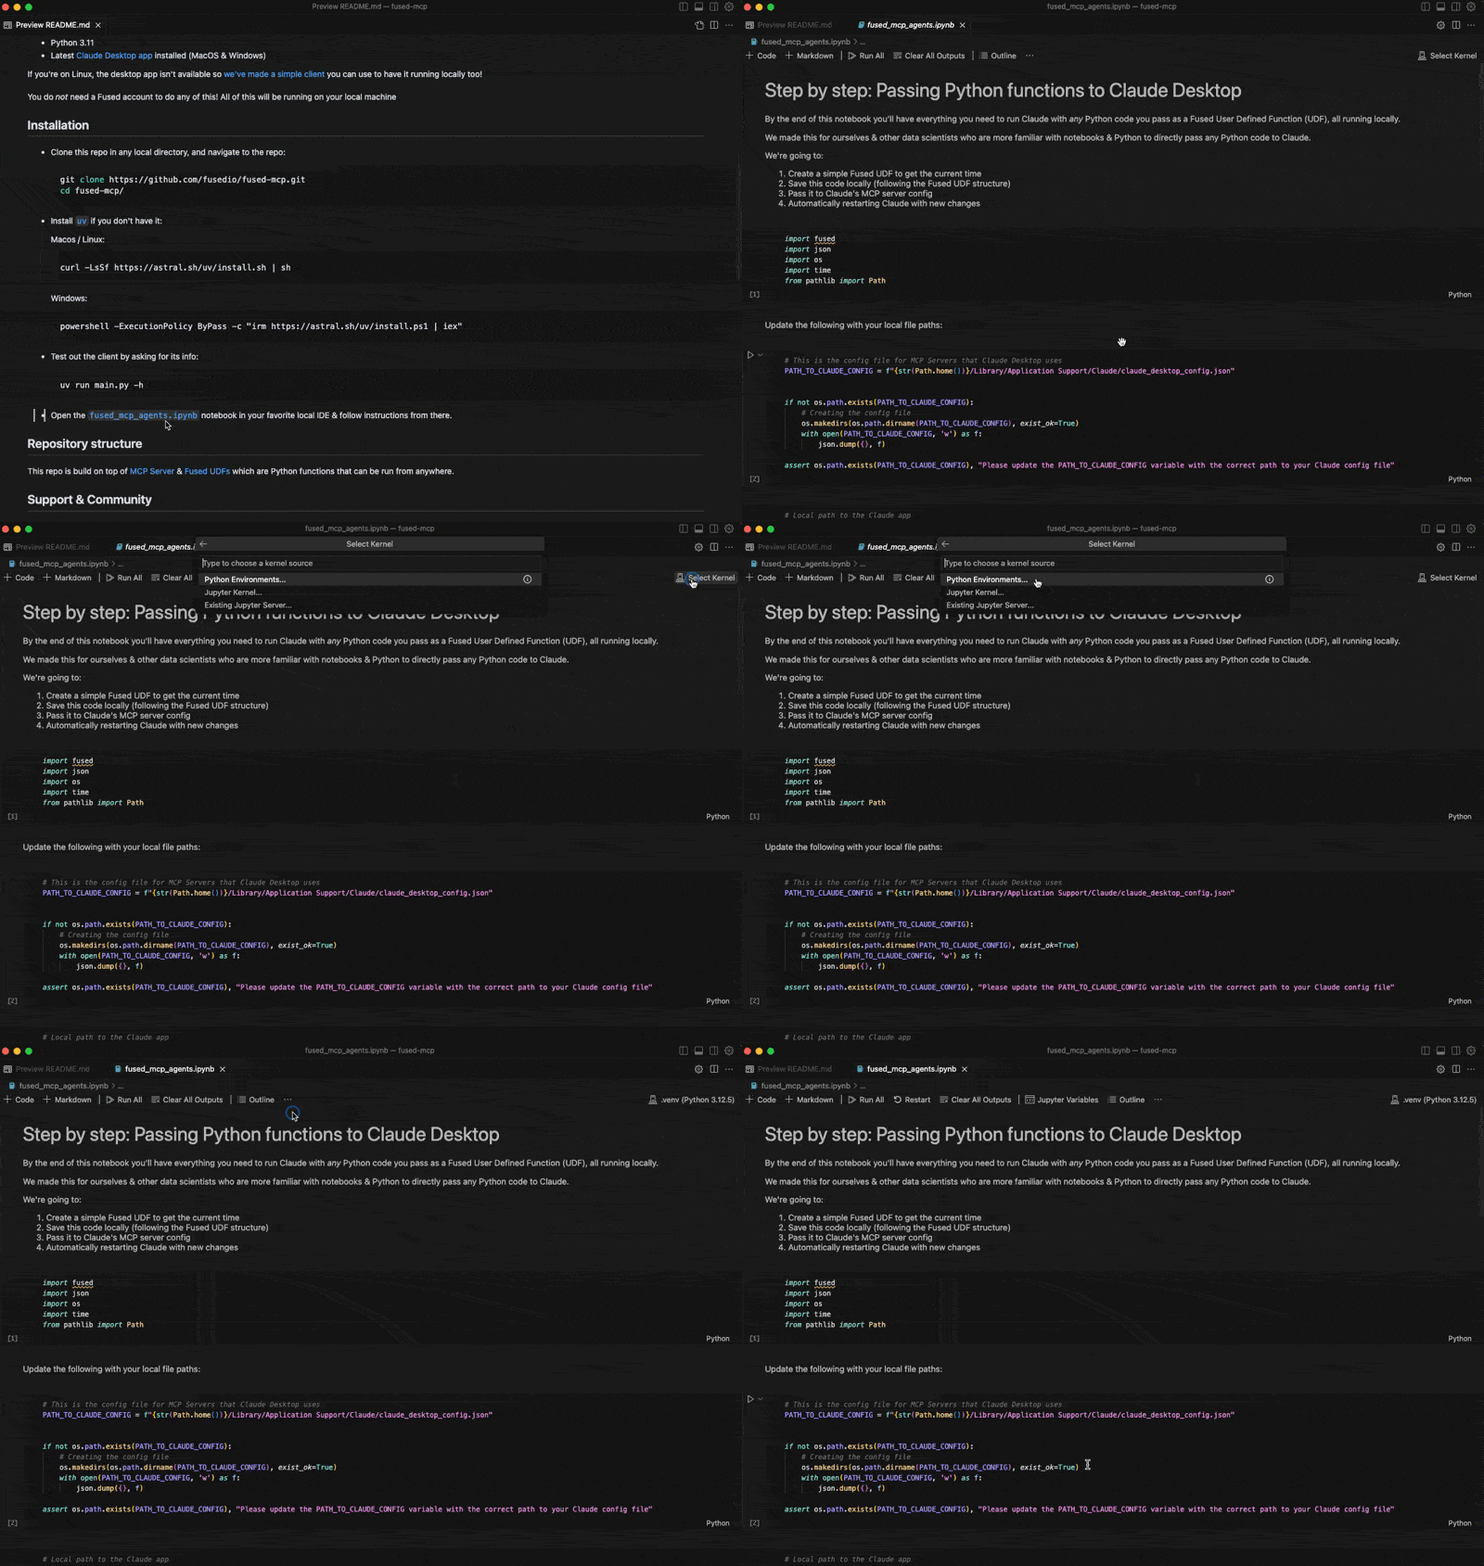
- Start by following our getting-started notebook fused_mcp_agents.ipynb in your favorite local IDE to get set up and then make your way to the more advanced notebook to make your own Agents & functions
Repository structure
This repo is build on top of MCP Server & Fused UDFs which are Python functions that can be run from anywhere.
Support & Community
Feel free to join our Discord server if you want some help getting unblocked!
Here are a few common steps to debug the setup:
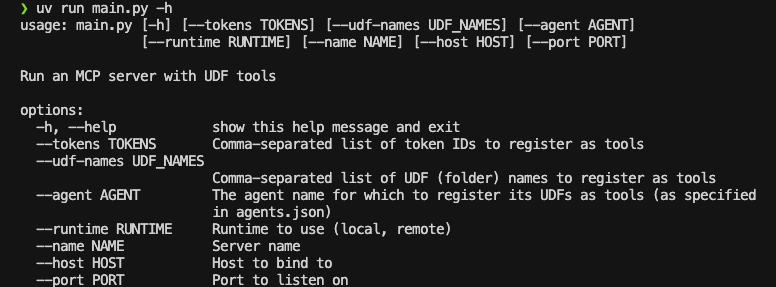
- Running uv run main.py -h should return something like this:
- You might need to pass global paths to some functions to the Claude_Desktop_Config.json. For example, by default we only pass uv:
{
    "mcpServers": {
        "qgis": {
            "command": "uv",
            "args": ["..."]
        }
}

}
But you might need to pass the full path to uv, which you can simply pass to common.generate_local_mcp_config in the notebook:
# in fused_mcp_agents.ipynb
import shutil
common.generate_local_mcp_config(

    config_path=PATH_TO_CLAUDE_CONFIG,

    agents_list = ["get_current_time"],

    repo_path= WORKING_DIR,

    uv_path=shutil.which('uv'),

)
Which would create a config like this:
{
    "mcpServers": {
        "qgis": {
            "command": "/Users/<YOUR_USERNAME>/.local/bin/uv",
            "args": ["..."]
        }
}

}
- If Claude runs without showing any connected tools, take a look at the MCP Docs for troubleshooting the Claude Desktop setup
Contribute
Feel free to open PRs to add your own UDFs to udfs/ so others can play around with them locally too!
Using a local Claude client (without Claude Desktop app)
If you are unable to install the Claude Desktop app (e.g., on Linux), we provide
a small example local client interface to use Claude with the MCP server configured
in this repo:
Sign in to leave a review
Use Google, GitHub, or an email account so ratings stay tied to real people.
No reviews posted yet.