
Hello-MCP 🚀
About
Hello-MCP 🚀 is a simple implementation of an MCP (Model Control Protocol) client and server. It helps developers understand what the MCP protocol is and how it works by providing hands-on experience in building and using both client and server components.
Details
- Transport
- SSE
- License
- MIT
Explore
- Supports registering MCP servers via SSE and stdio transports
- Interactive command-line chat interface
- Integrates with DeepSeek API (configurable API key)
- Streamed response output
- Simple server built on FastMCP with a path utility tool
- Health check endpoint on the server

Setting up with Highlight
This MCP is not yet compatible with Highlight’s one-click setup. However, you can still use it with Highlight by following these steps:
- Download and install Highlight from highlightai.com/download
- Navigate to the plugins tab and select "Add Custom Plugin"
-
Configure the plugin with the settings below
Plugin Name
Hello-MCP 🚀Command (node, npx, python, etc.)Please refer to the README for specific instructions on how to obtain API keys or other required environment variables.
- Enable "Start Automatically" if you want the plugin to start when Highlight launches





From the repository
> Recommended to use uv for project management
macOS:
curl -LsSf https://astral.sh/uv/install.sh | sh
Windows (requires PowerShell):
powershell -ExecutionPolicy ByPass -c "irm https://astral.sh/uv/install.ps1 | iex"
A: Ensure:
1. api_key field in config.yaml is correctly filled
2. No extra spaces or quotes in the key
3. Try regenerating API key if authentication fails
Resource
Recommendation
| Resource | Recommendation |
| ------------------------------------------------------------------------- | ------------- |
| Smithery - Model Context Protocol Registry | 🌟🌟🌟 |
| https://github.com/punkpeye/awesome-mcp-servers | 🌟🌟🌟 |
| https://github.com/modelcontextprotocol/servers | 🌟🌟🌟 |
| List of all MCP Servers (42) \| Portkey | 🌟🌟 |
| https://cursor.directory/mcp | 🌟🌟 |
| Open-Source MCP servers \| Glama | 🌟🌟 |
| https://mcp.so/ | 🌟🌟 |
| https://www.pulsemcp.com/servers | 🌟🌟 |
| Awesome MCP Servers | 🌟🌟 |
A: Steps:
1. Add new tool function in server.py
2. Register with @tool decorator
3. Define input parameter schema
4. Test calling from client
Claude Desktop / Cursor
Paste into your MCP client config file to install this server.
{
    "mcpServers": {
        "hello-mcp \ud83d\ude80": {
            "hello-mcp": {
                "command": "uv",
                "args": [
                    "venv",
                    "#",
                    "Create",
                    "virtual",
                    "environment"
                ]
            }
        }
    }
}McpServers
{
    "hello-mcp": {
        "command": "uv",
        "args": [
            "venv",
            "#",
            "Create",
            "virtual",
            "environment"
        ]
    }
}
---
中文文档 🇨🇳
A simple implementation of MCP (Model Control Protocol) client and server.
Helps understand what MCP protocol is and how it works.
This project will ✅:
- Teach you the essence of MCP protocol
- Let you build your own MCP Client and Server
- Provide hands-on experience with MCP implementation
This project won't ❌:
- Teach you how to configure existing MCP Hosts
- Implement generic server functionality (requires your own exploration)
Features ✨
MCP Client
- Supports registering MCP Server (both SSE and stdio methods) - Interactive command line chat interface - Supports DeepSeek API conversations (configure API key in config file) - Streamed response outputMCP Server
- Simple server based on FastMCP (supports both SSE and stdio) - Provides a basic path utility (lists all files in specified path) - Health check supportDEMO
Use List_Dir Tool to get files and analysis!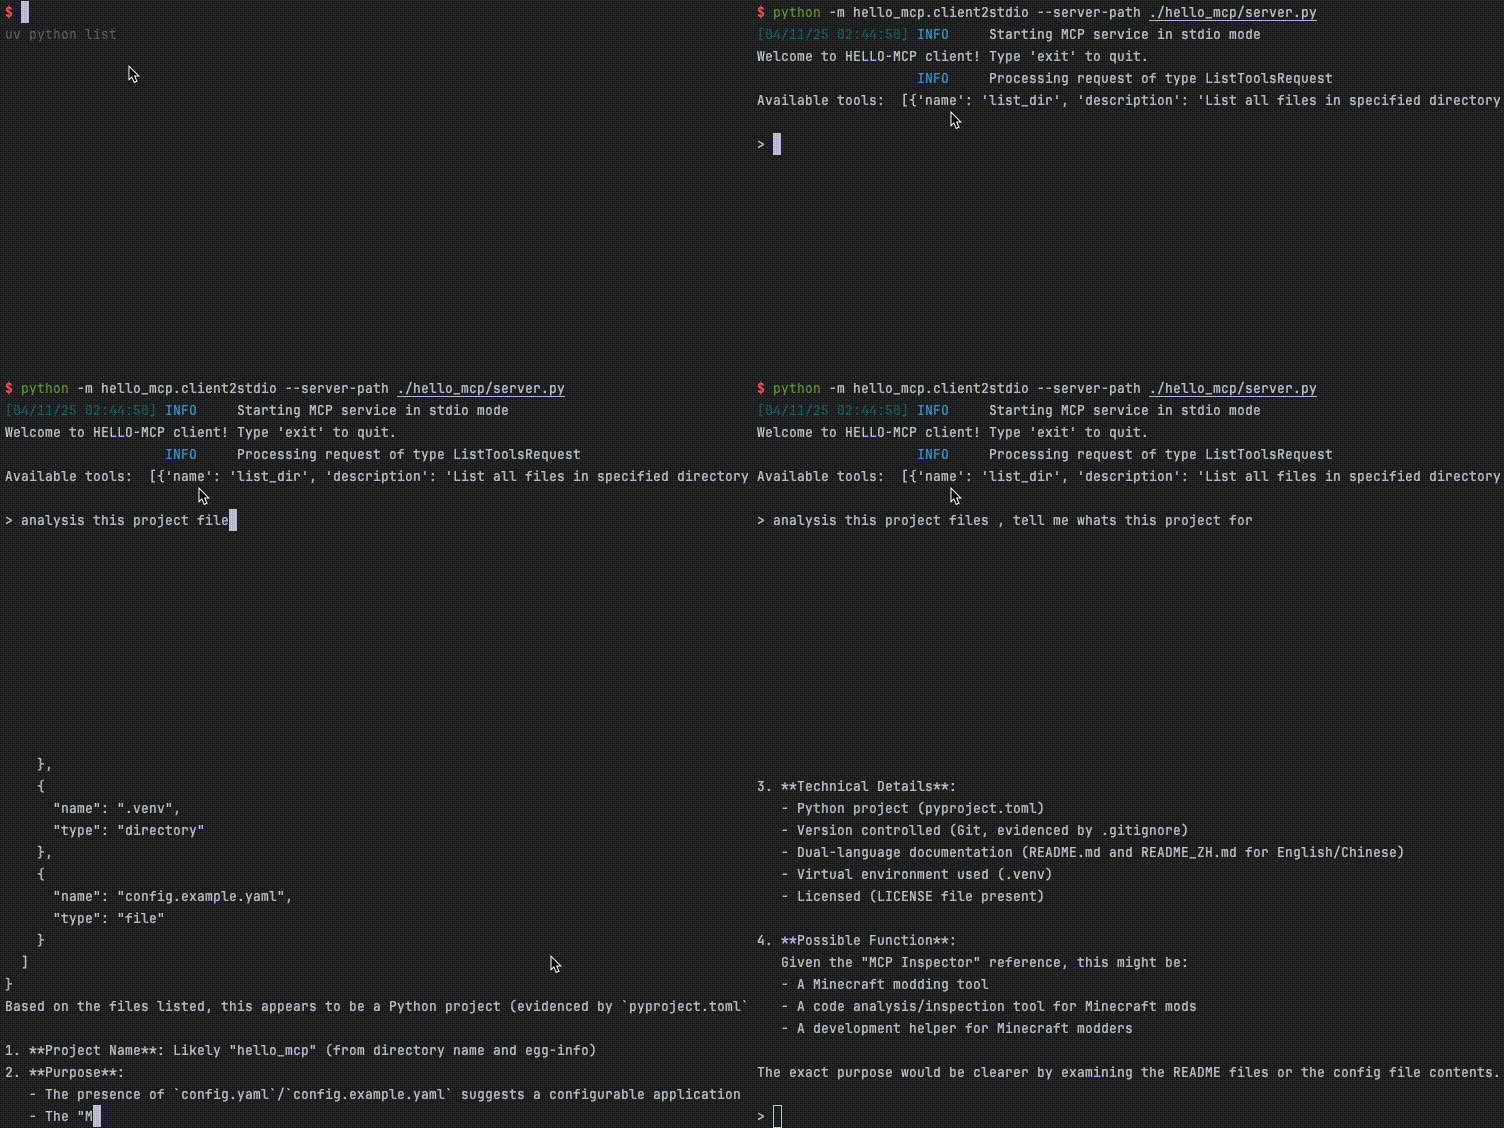
Usage Guide 📖
Environment Setup
> Recommended to use uv for project management
0. Clone the project
git clone https://github.com/Cookie-HOO/hello-mcp.git
cd hello-mcp
1. Install uv
macOS:
curl -LsSf https://astral.sh/uv/install.sh | sh
Windows (requires PowerShell):
powershell -ExecutionPolicy ByPass -c "irm https://astral.sh/uv/install.ps1 | iex"
2. Initialize project dependencies
uv venv  # Create virtual environment
uv sync  # Install dependencies
source ./.venv/bin/activate  # macOS: activate virtual environment
.\.venv\Scripts\activate     # Windows: activate virtual environment
3. Set up DeepSeek API key
Currently only supports DeepSeek API - apply at: DeepSeek API Platform```bash
cp ./config.example.yaml ./config.yaml
Sign in to leave a review
Use Google, GitHub, or an email account so ratings stay tied to real people.
No reviews posted yet.



