
mcp-desk
About
A Desktop Application To Interact With Your MCP Servers
Explore
- Electron Desktop Application: Cross-platform compatibility (Windows, macOS, Linux).
- React Frontend: Modern UI built with React and TypeScript.
- Shadcn UI & Tailwind CSS: Utilizes Shadcn UI components and Tailwind CSS (v3) for a consistent and utility-first styling approach.
- MCP Client: Connect to and interact with MCP servers using easy-mcp-use.
- AI Agent Chat: Integrated chat interface powered by Langchain and OpenRouter models.
- Tool Usage: Supports AI models capable of tool calling.
- Model Selection: Allows users to select different LLM models.
- Settings Management: Configure MCP server details and manage application settings.
- Import/Export: Backup and restore application settings (stored in localStorage) via JSON files.
- Markdown Support: Renders assistant messages in Markdown format within the chat UI.
- IPC Communication: Efficient communication between the main and renderer processes.
<p align="right">(<a href="#readme-top">back to top</a>)</p>
Follow these steps to get a local copy of mcp-desk up and running for development or contribution. If you just want to use the application, see the <a href="#download-pre-built-application">Download Pre-built Application</a> section below.
<p align="right">(<a href="#readme-top">back to top</a>)</p>
Node.js (Check package.json engines or project requirements for specific version)
pnpm package manager
npm install -g pnpm
<a id="readme-top"></a>
<!-- PROJECT LOGO -->
<br />
<div align="center">
<!-- Add your project logo here -->

<h1 align="center">MCP Desk</h1>
<p align="center">
MCP Desk - Your Own MCP Client built with Electron, React, and TypeScript.
<br />
<br />
<!-- Update these links once you have a public repository -->
<a href="#application-interface-gallery">View Demo</a>
·
<a href="https://github.com/debsouryadatta/mcp-desk/issues/new?labels=bug&template=bug-report---.md">Report Bug</a>
·
<a href="https://github.com/debsouryadatta/mcp-desk/issues/new?labels=enhancement&template=feature-request---.md">Request Feature</a>
</p>
</div>
<!-- SCREENSHOTS -->
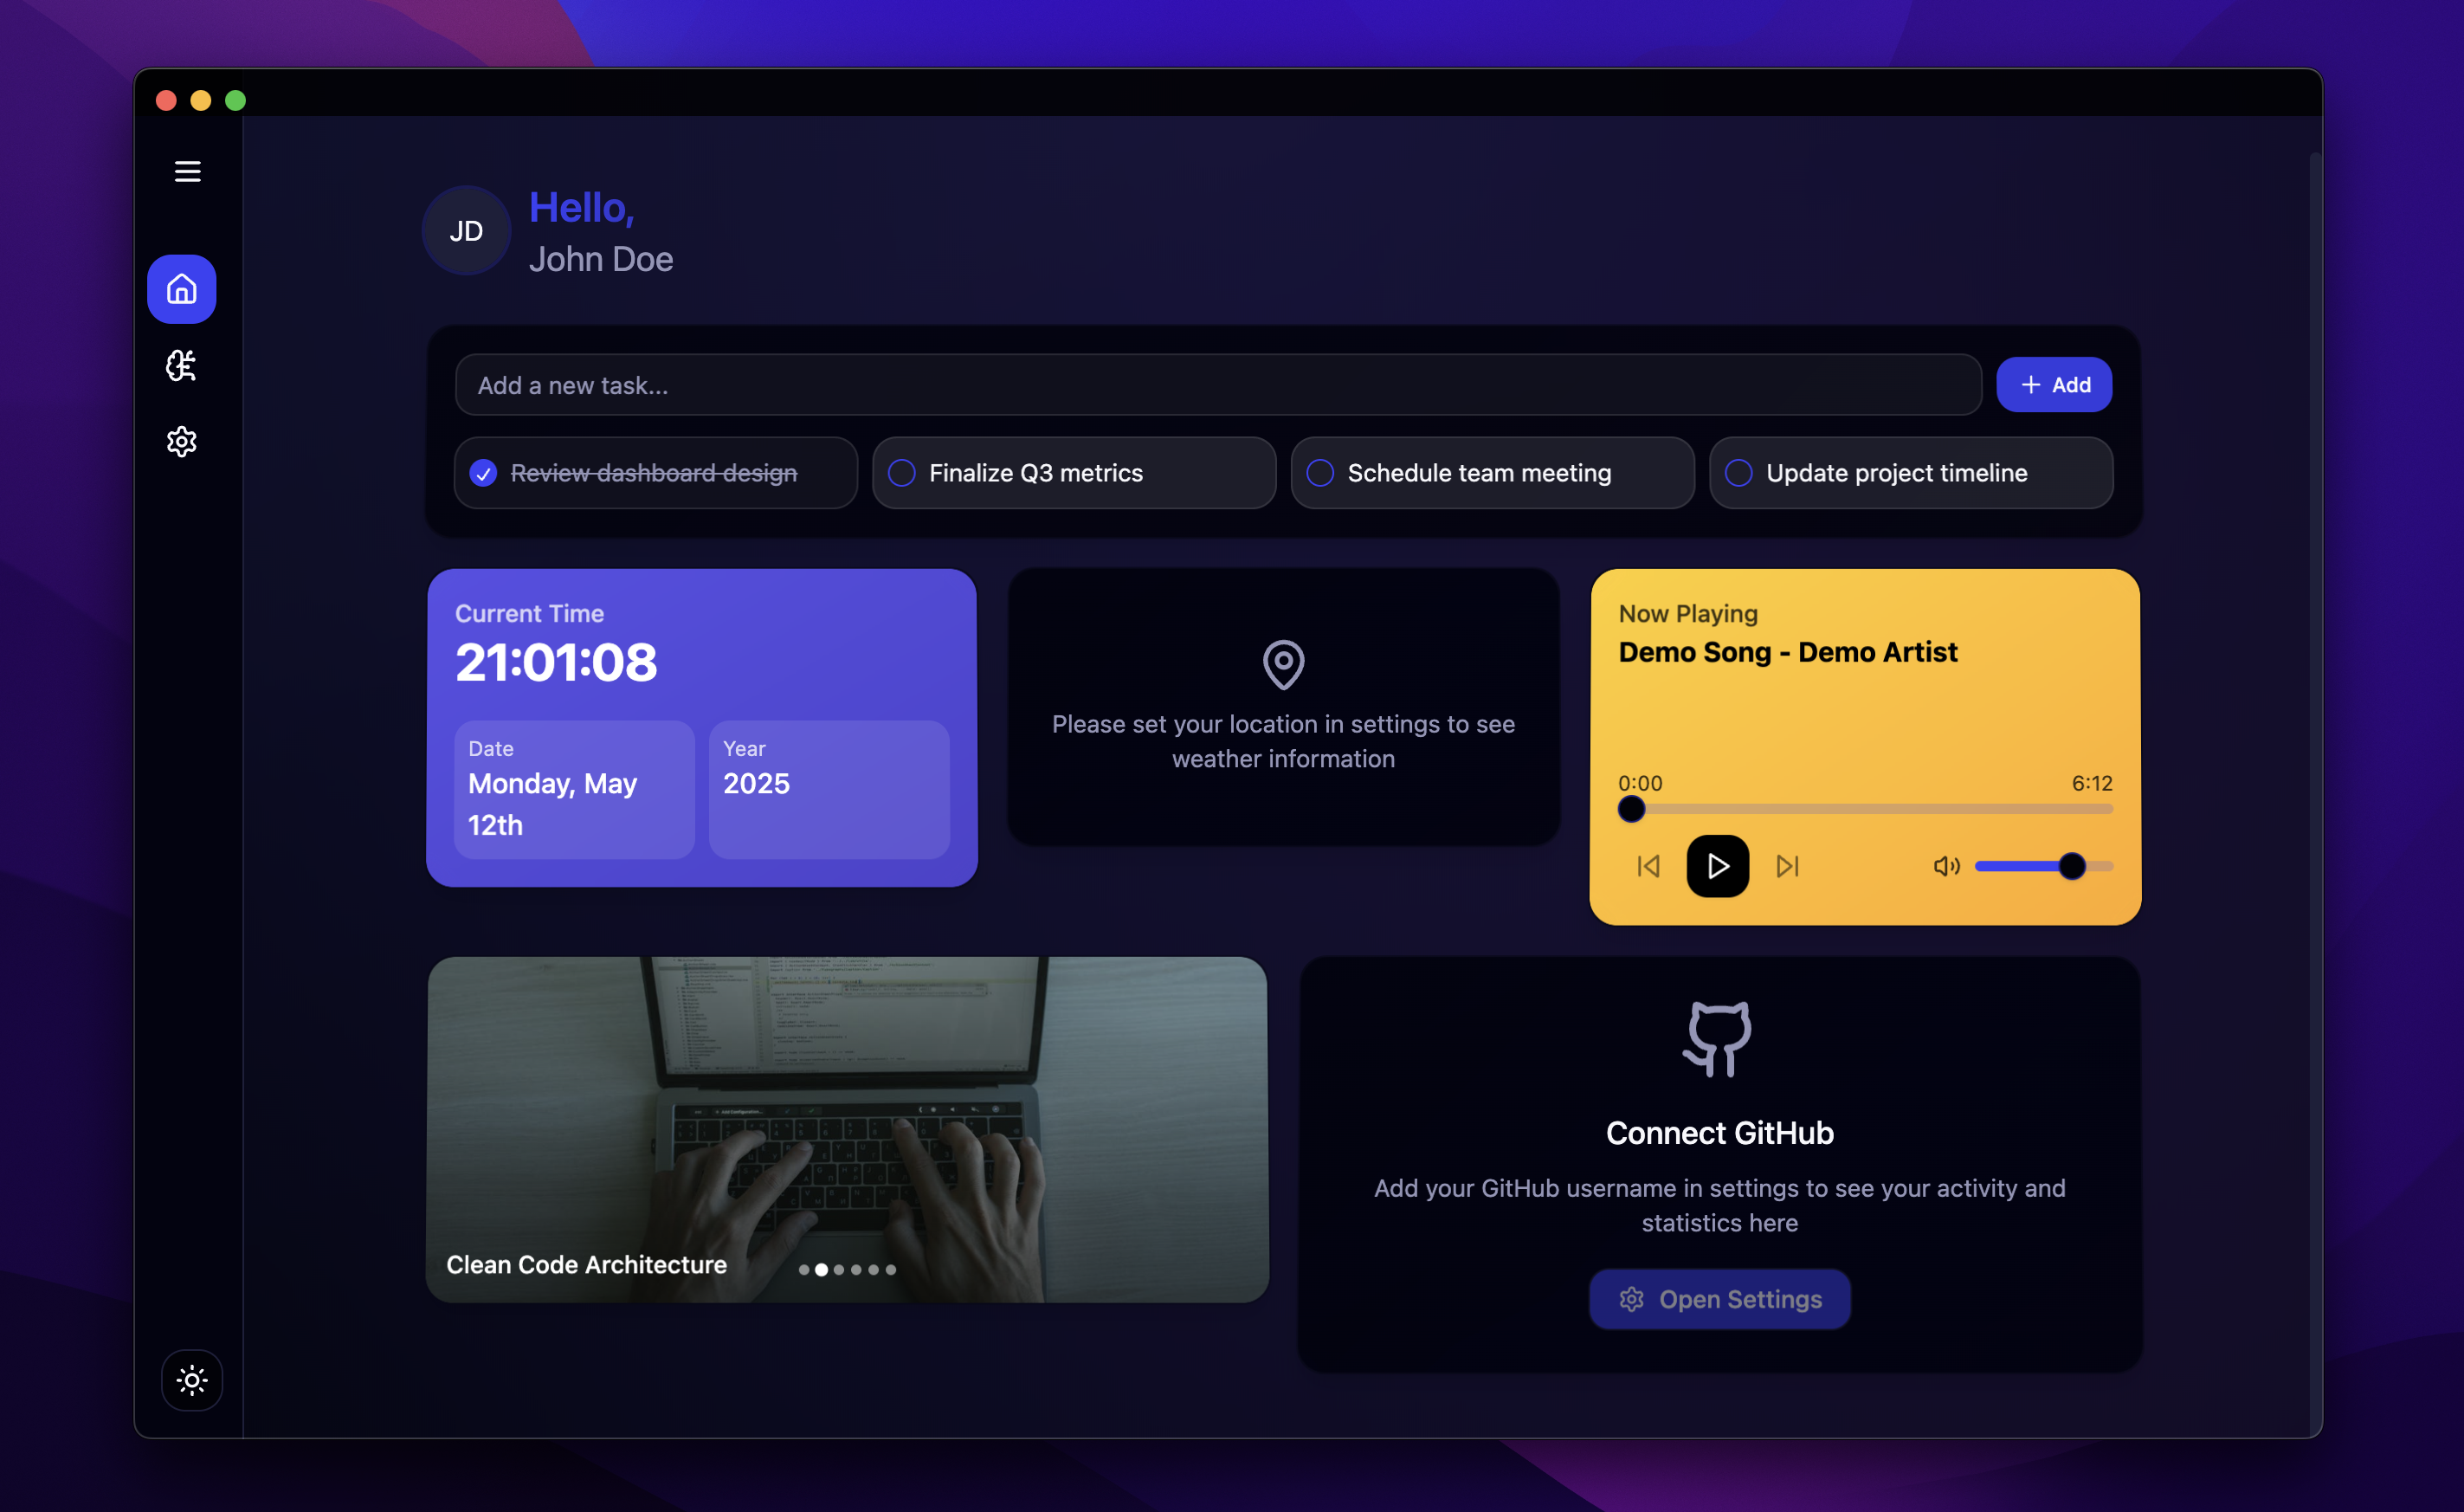
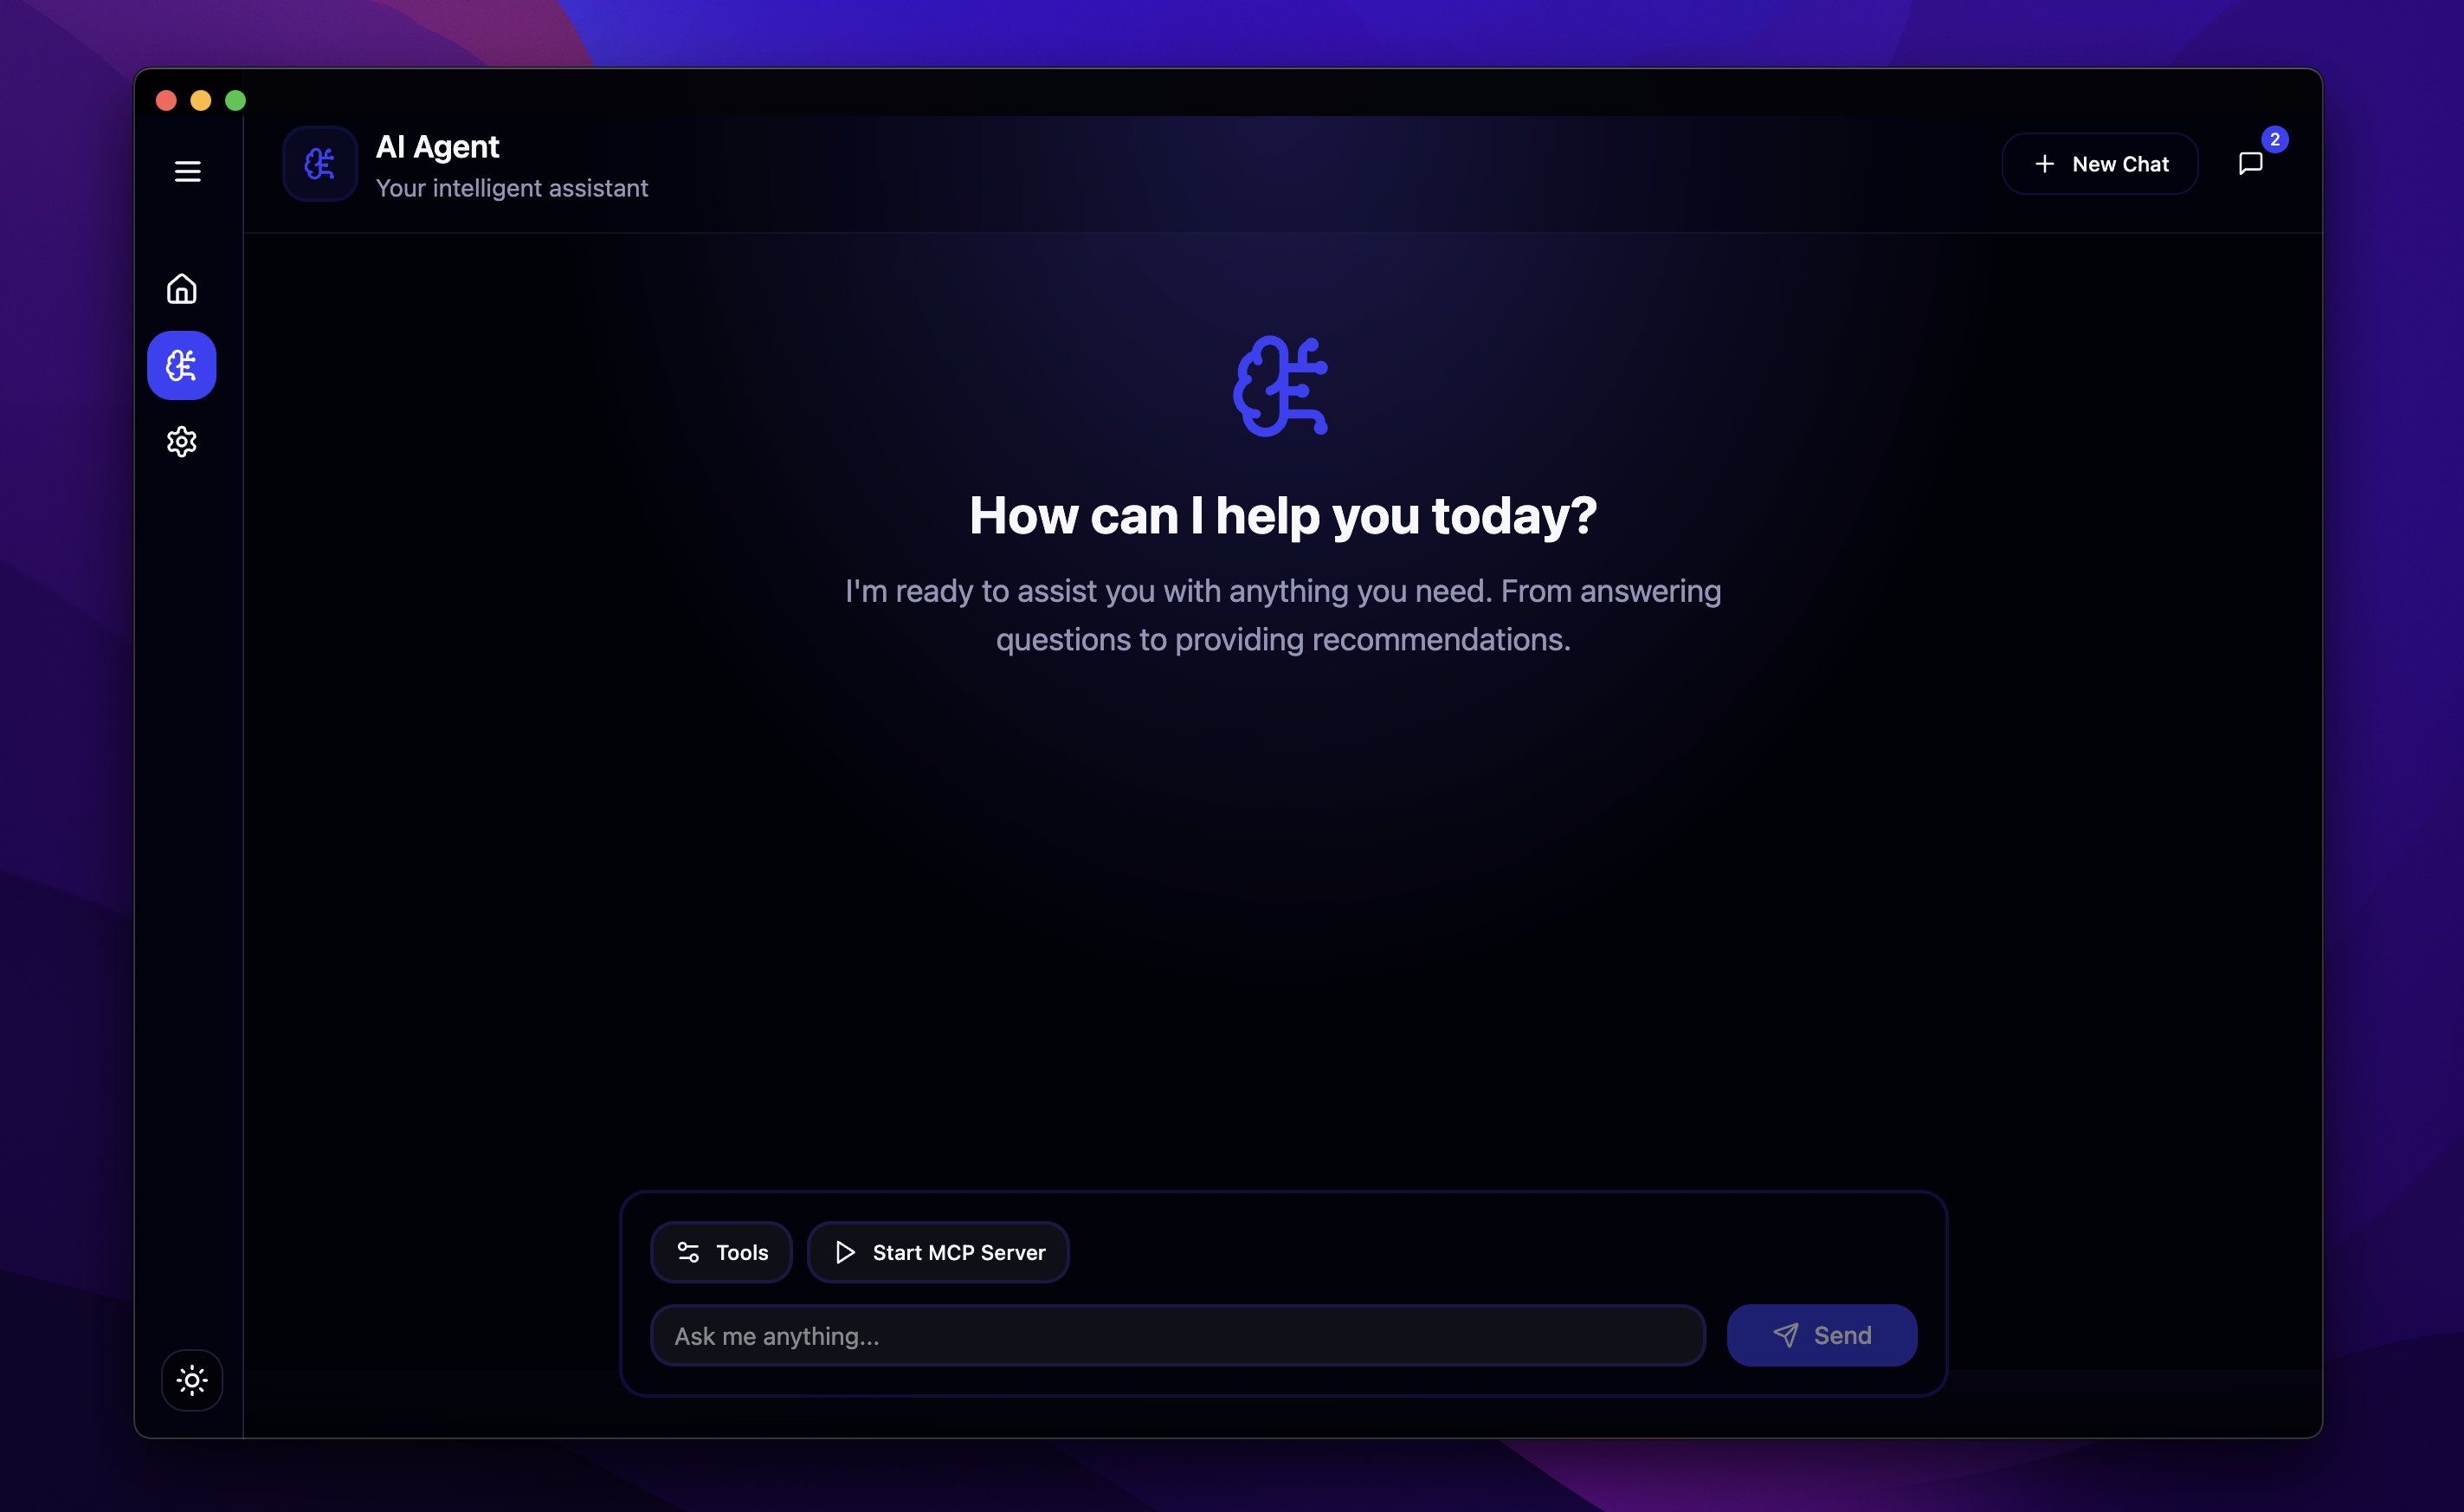
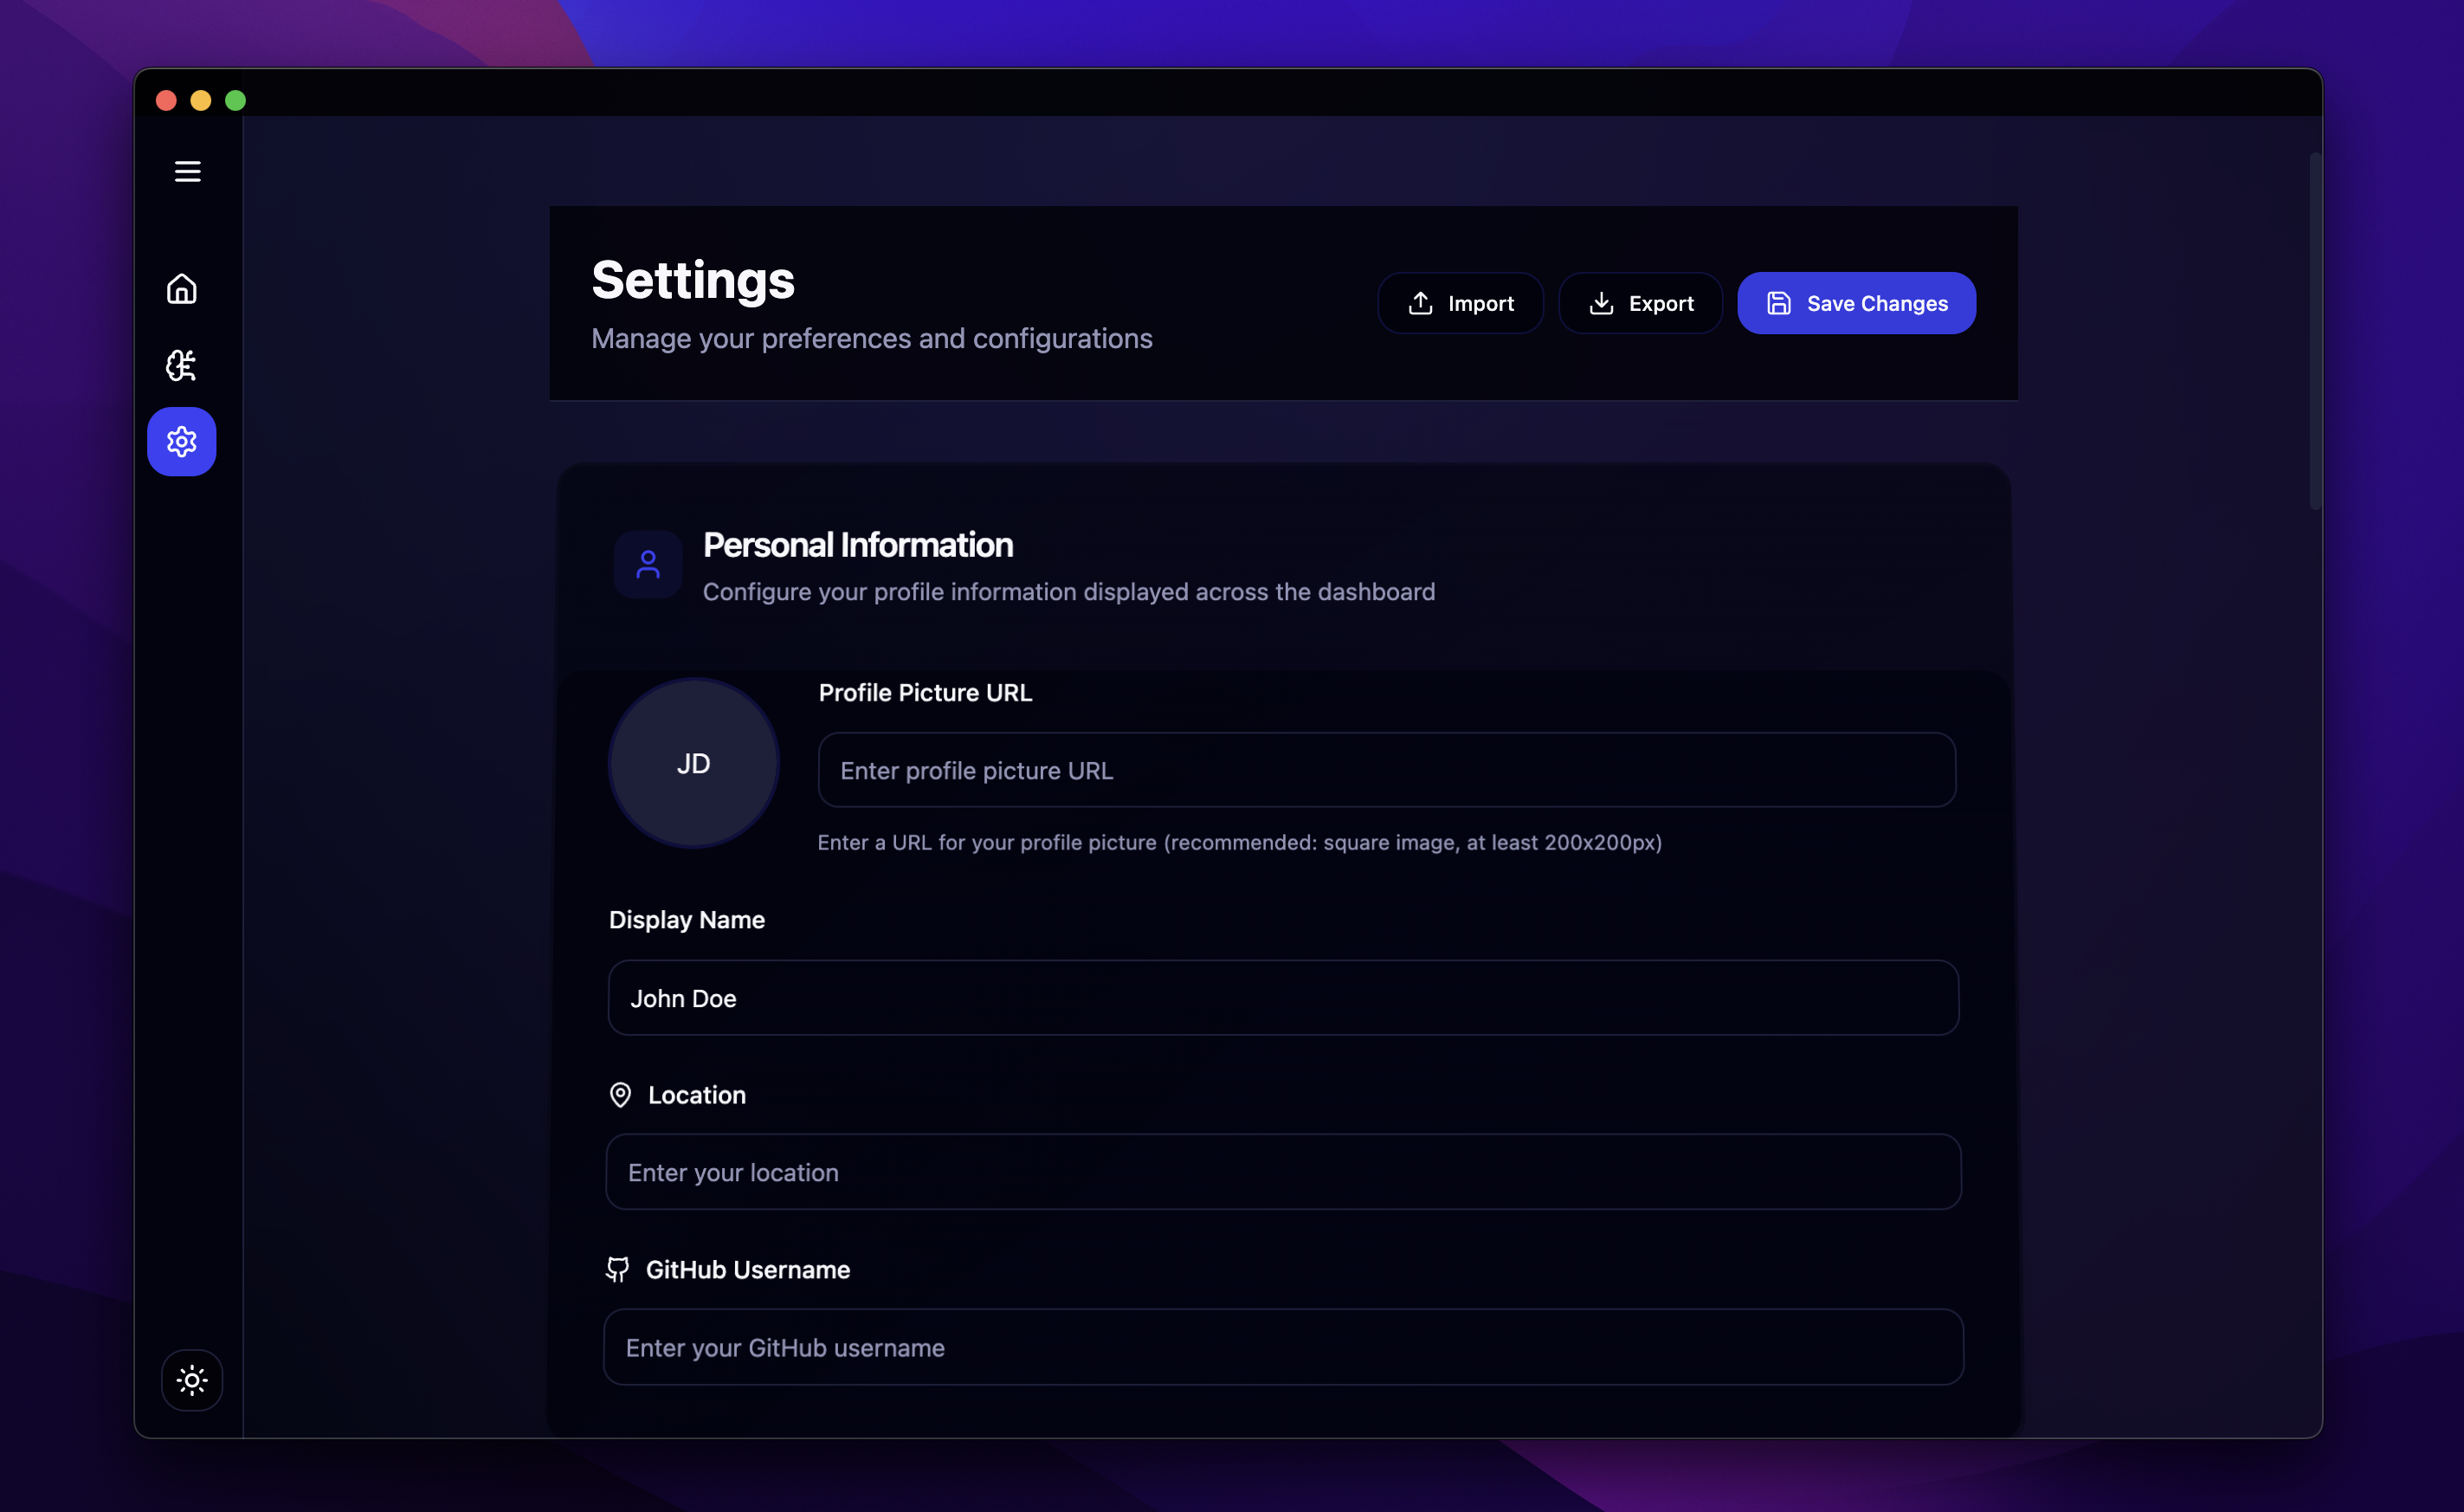
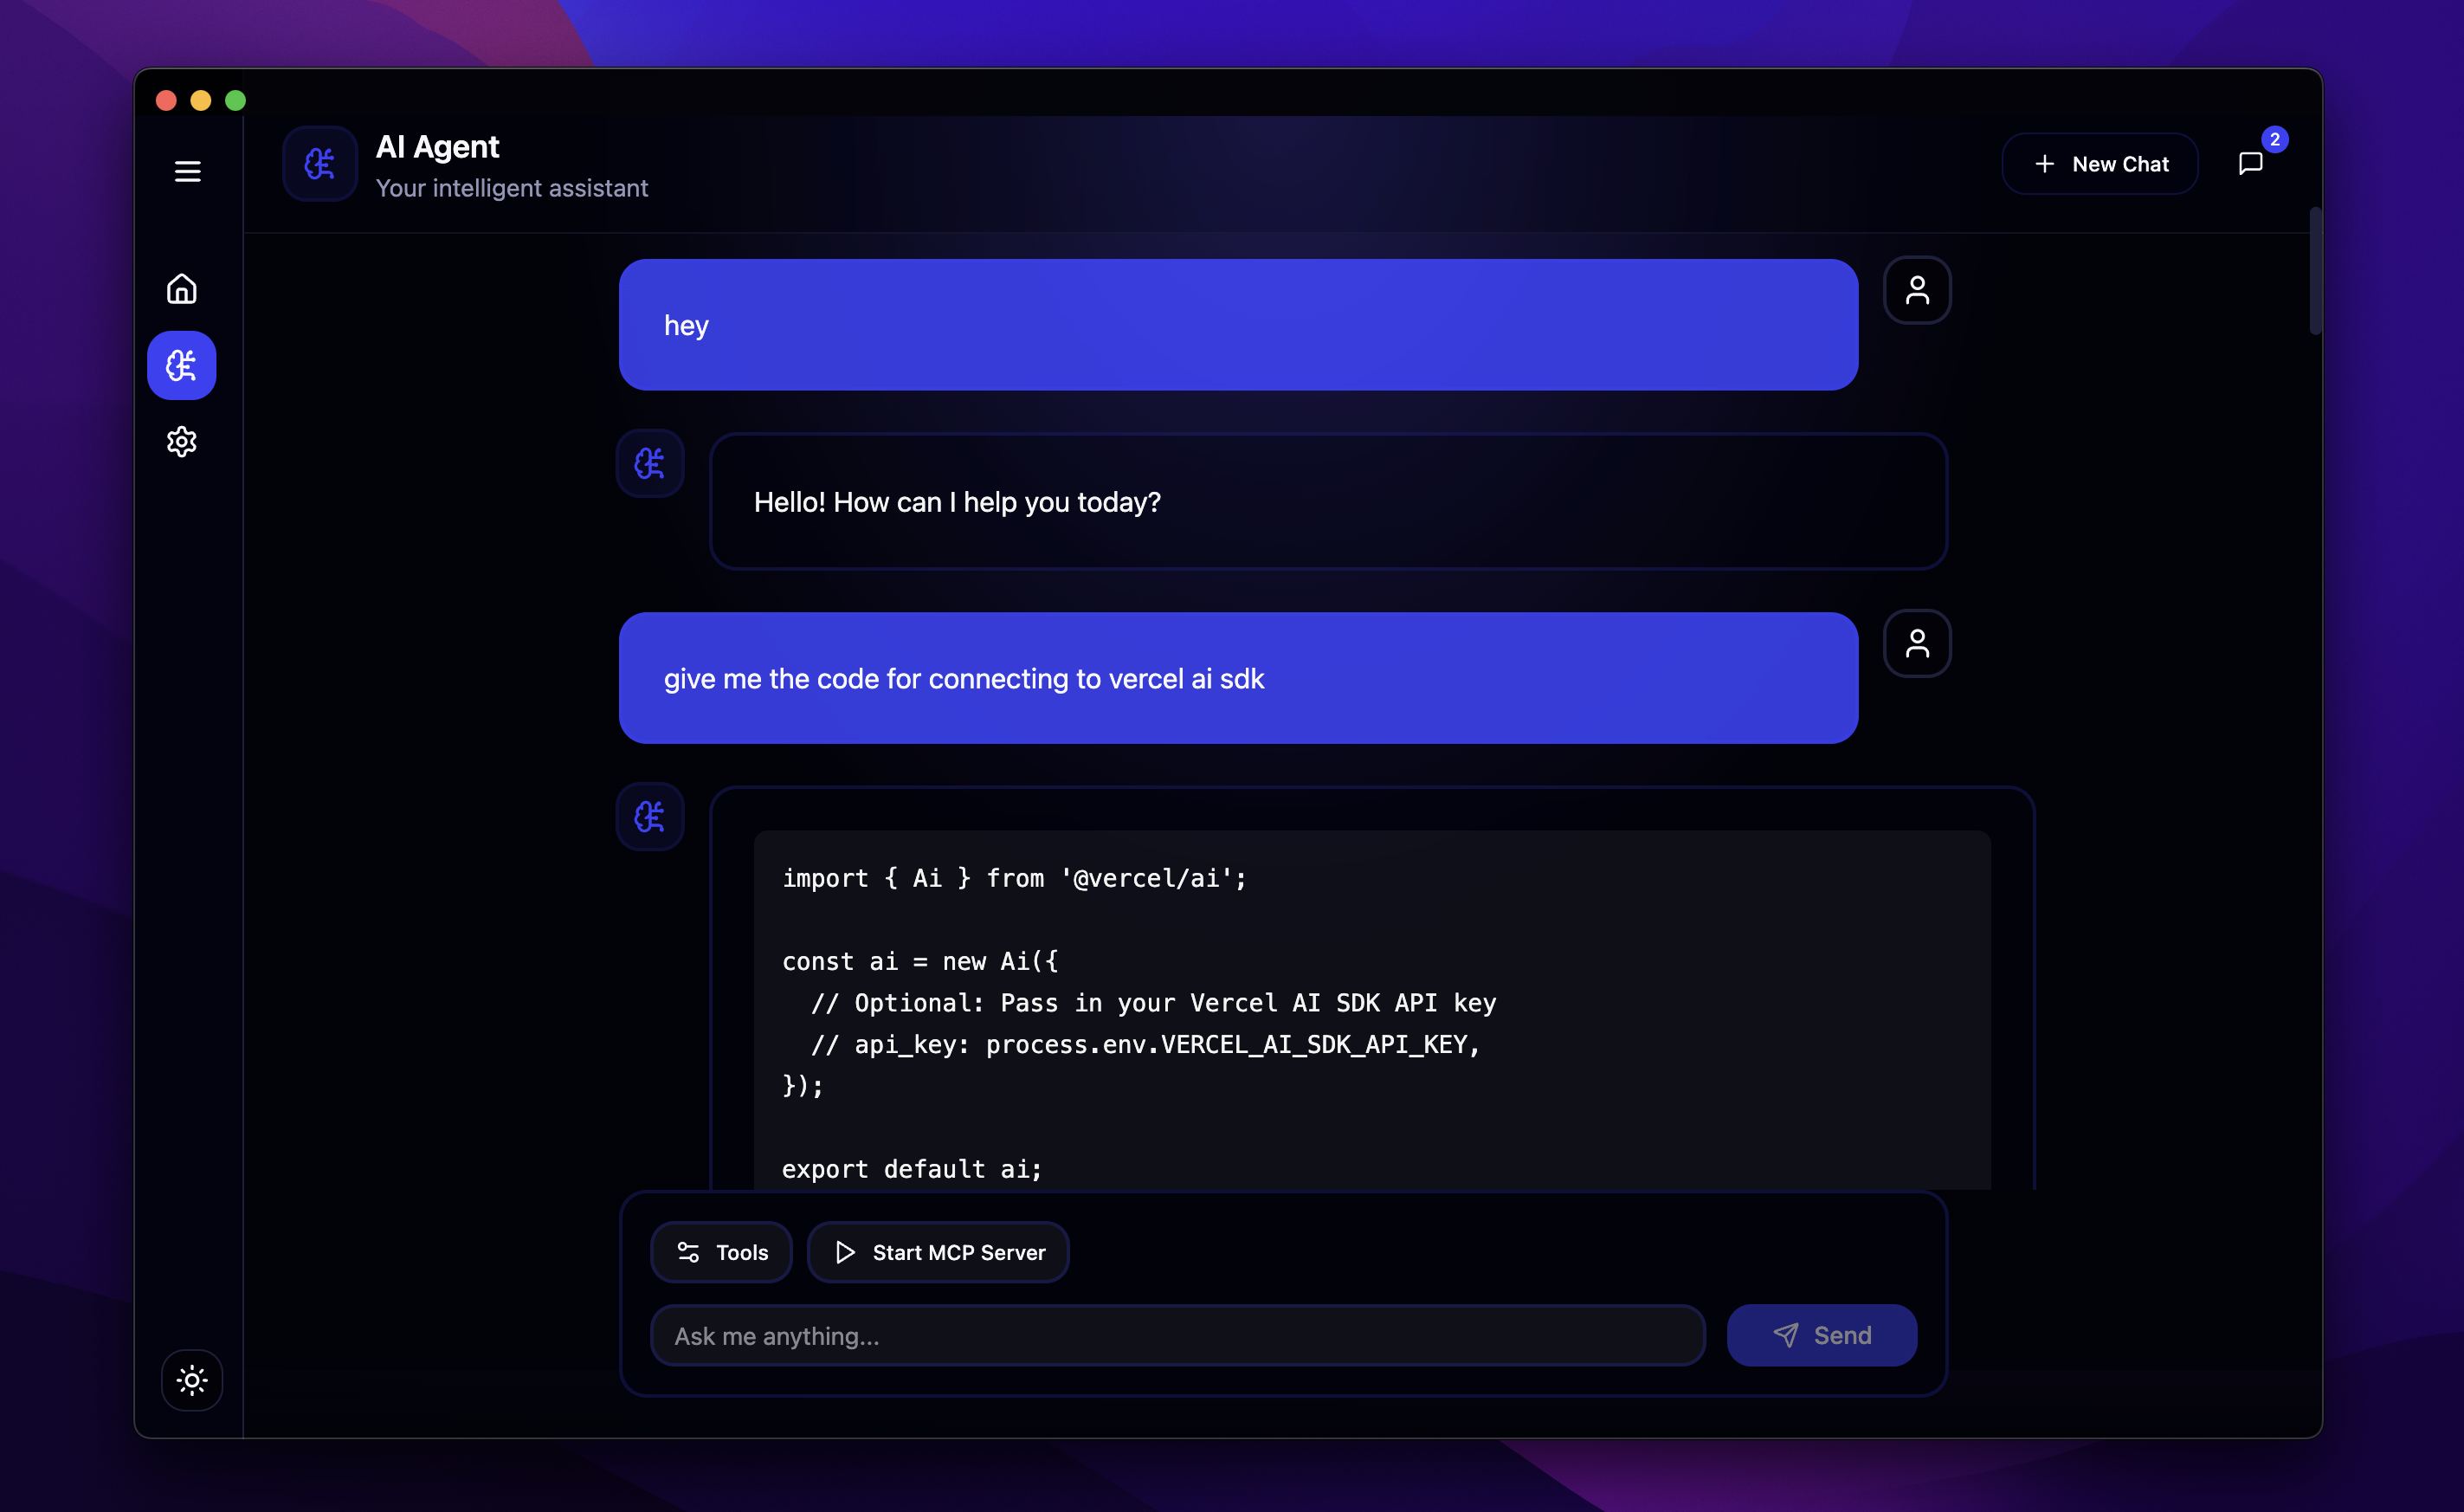
Application Interface Gallery
Explore the visual design and functionality of MCP Desk through these screenshots:
Here are some screenshots showcasing the mcp-desk application:
<br/>
<br/>
<br/>
<br/>
<p align="right">(<a href="#readme-top">back to top</a>)</p>
<!-- TABLE OF CONTENTS -->
<details>
<summary>Table of Contents</summary>
<ol>
<li><a href="#application-interface-gallery">Application Interface Gallery</a></li>
<li>
<a href="#about-the-project">About The Project</a>
<ul>
<li><a href="#key-features">Key Features</a></li>
<li><a href="#built-with">Built With</a></li>
</ul>
</li>
<li>
<a href="#getting-started">Getting Started</a>
<ul>
<li><a href="#prerequisites">Prerequisites</a></li>
<li><a href="#installation">Installation</a></li>
<li><a href="#development">Development</a></li>
<li><a href="#build">Build</a></li>
<li><a href="#download-pre-built-application">Download Pre-built Application</a></li>
</ul>
</li>
<li><a href="#usage">Usage</a></li>
<li><a href="#contributing">Contributing</a></li>
<li><a href="#contact">Contact</a></li>
</ol>
</details>
<!-- ABOUT THE PROJECT -->
About The Project
mcp-desk is a desktop application designed to serve as a client for interacting with Multi-Capability Platform (MCP) servers. Built using modern web technologies within the Electron framework, it provides a user-friendly interface for managing MCP configurations and leveraging AI agent capabilities, including tool usage powered by models like those from OpenRouter via Langchain.
The application features a chat interface for interacting with AI agents, settings management for MCP server configurations, and the ability to import/export application settings.
<p align="right">(<a href="#readme-top">back to top</a>)</p>
Key Features
- Electron Desktop Application: Cross-platform compatibility (Windows, macOS, Linux).
- React Frontend: Modern UI built with React and TypeScript.
- Shadcn UI & Tailwind CSS: Utilizes Shadcn UI components and Tailwind CSS (v3) for a consistent and utility-first styling approach.
- MCP Client: Connect to and interact with MCP servers using easy-mcp-use.
- AI Agent Chat: Integrated chat interface powered by Langchain and OpenRouter models.
- Tool Usage: Supports AI models capable of tool calling.
- Model Selection: Allows users to select different LLM models.
- Settings Management: Configure MCP server details and manage application settings.
- Import/Export: Backup and restore application settings (stored in localStorage) via JSON files.
- Markdown Support: Renders assistant messages in Markdown format within the chat UI.
- IPC Communication: Efficient communication between the main and renderer processes.
<p align="right">(<a href="#readme-top">back to top</a>)</p>
Built With
Electron - Cross-platform desktop app framework
Electron Vite - Build toolchain for Electron
React - UI library
TypeScript - Strongly typed JavaScript
Tailwind CSS (v3) - Utility-first CSS framework
Shadcn UI - Re-usable UI components
Langchain - Framework for developing applications powered by language models
OpenRouter - AI models and API
easy-mcp-use - Library for interacting with MCP servers
<p align="right">(<a href="#readme-top">back to top</a>)</p>
<!-- GETTING STARTED -->
Getting Started
Follow these steps to get a local copy of mcp-desk up and running for development or contribution. If you just want to use the application, see the <a href="#download-pre-built-application">Download Pre-built Application</a> section below.
<p align="right">(<a href="#readme-top">back to top</a>)</p>
Download Pre-built Application
If you just want to use mcp-desk without setting up a development environment, you can download the latest pre-built version for your operating system directly from the GitHub Releases page:
Download Latest Release (v1.0.0)
Download the appropriate file for your system (.dmg for macOS, .exe for Windows) and install it as you would any other application.
Note for Linux Users: Currently, pre-built packages for Linux are not available in the release. Linux users should follow the <a href="#installation">Installation</a> and <a href="#build">Build</a> instructions to set up the project locally and then run pnpm build:linux to generate the Linux distribution file.
<p align="right">(<a href="#readme-top">back to top</a>)</p>
Prerequisites (for Development)
Node.js (Check package.json engines or project requirements for specific version)
pnpm package manager
npm install -g pnpm
Installation
1. Clone the repository (Update URL if needed)
    git clone https://github.com/debsouryadatta/mcp-desk.git

    cd mcp-desk
2. Install dependencies using pnpm
pnpm install
<p align="right">(<a href="#readme-top">back to top</a>)</p>
Development
To run the application in development mode with hot-reloading:
pnpm run dev
<p align="right">(<a href="#readme-top">back to top</a>)</p>
Build
To build the application for distribution:
# For Windows
pnpm run build:win
For macOS
pnpm run build:mac
For Linux
pnpm run build:linux
dist or a relevant output directory specified by electron-builder.
<p align="right">(<a href="#readme-top">back to top</a>)</p>
<!-- USAGE EXAMPLES -->
Usage
After launching the application (pnpm run dev or by running the built executable):
1. Configure MCP Server: Navigate to the settings section to input your MCP server configuration details.
2. Select LLM Model: Choose your preferred language model from the available options.
3. Interact via Chat: Use the chat interface to send requests to the configured AI agent.
4. Manage Settings: Use the import/export functionality in settings to back up or restore your configurations.
Refer to the application's UI for more detailed usage instructions.
<p align="right">(<a href="#readme-top">back to top</a>)</p>
<!-- CONTRIBUTING -->
Contributing
Contributions are welcome! If you have suggestions for improving mcp-desk, please feel free to contribute.
1. Fork the Project
2. Create your Feature Branch (git checkout -b feature/AmazingFeature)
3. Commit your Changes (git commit -m 'Add some AmazingFeature')
4. Push to the Branch (git push origin feature/AmazingFeature)
5. Open a Pull Request
<p align="right">(<a href="#readme-top">back to top</a>)</p>
<!-- CONTACT -->
Contact
Debsourya Datta - X Profile @debsourya005 - Email [email protected]
Project Link: https://github.com/debsouryadatta/mcp-desk
<p align="right">(<a href="#readme-top">back to top</a>)</p>
Sign in to leave a review
Use Google, GitHub, or an email account so ratings stay tied to real people.
No reviews posted yet.



