Auth0
About
Integrates with LLMs and AI agents, allowing you to perform various Auth0 management operations using natural language. For instance, you could simply ask Claude to create a new Auth0 app and get the domain and client ID.
Details
- Repository
- auth0/auth0-mcp-server
- License
- MIT
Explore
npx @auth0/auth0-mcp-server run --tools 'auth0_list_logs,auth0_get_log'

Setting up with Highlight
This MCP is not yet compatible with Highlight’s one-click setup. However, you can still use it with Highlight by following these steps:
- Download and install Highlight from highlightai.com/download
- Navigate to the plugins tab and select "Add Custom Plugin"
-
Configure the plugin with the settings below
Plugin Name
Auth0Command (node, npx, python, etc.)npxArguments-
Argument 1
-y -
Argument 2
@auth0/auth0-mcp-server -
Argument 3
run
Environment-
DEBUG
auth0-mcp
Please refer to the README for specific instructions on how to obtain API keys or other required environment variables.
-
Argument 1
- Enable "Start Automatically" if you want the plugin to start when Highlight launches





From the repository
Prerequisites:
- Node.js v18 or higher
- Claude Desktop or any other MCP Client
- Auth0 account with appropriate permissions
<br/>
Install Auth0 MCP Server and configure it to work with your preferred MCP Client. The --tools parameter specifies which tools should be available (defaults to if not provided).
Claude Desktop with all tools
npx @auth0/auth0-mcp-server init
Claude Desktop with read-only tools
npx @auth0/auth0-mcp-server init --read-only
You can also explicitly select read-only tools:
npx @auth0/auth0-mcp-server init --tools 'auth0_list_,auth0_get_'
Claude Code
Initialize the Auth0 MCP server for Claude Code
npx @auth0/auth0-mcp-server init --client claude-code
You will be prompted to choose a configuration scope:
- User — written to ~/.claude.json and available across all your projects.
- Project — written to .mcp.json at a project folder you specify, intended to be checked into version control and shared with your team.
Windsurf
npx @auth0/auth0-mcp-server init --client windsurf
Cursor
Step 1:

Step 2:
npx @auth0/auth0-mcp-server init --client cursor
Cursor with limited tools access
npx @auth0/auth0-mcp-server init --client cursor --tools 'auth0_list_applications,auth0_get_application'
VS Code
npx @auth0/auth0-mcp-server init --client vscode
You can configure VS Code for either global or workspace scope:
- Global: Available in all VS Code instances
- Workspace: Available only in a specific project/repository
The command will prompt you to choose your preferred scope and automatically configure the appropriate mcp.json file.
VS Code with limited tools access
npx @auth0/auth0-mcp-server init --client vscode --tools 'auth0_list_,auth0_get_*' --read-only
Gemini CLI
Initialize the gemini MCP server for the Gemini CLI
npx @auth0/auth0-mcp-server init --client gemini
Install the Gemini Extension
gemini extensions install https://github.com/auth0/auth0-mcp-server
Codex CLI
Authenticate once with Auth0:
npx @auth0/auth0-mcp-server init
Then add the Auth0 MCP server to Codex:
codex mcp add auth0 --env DEBUG=auth0-mcp --env DBUS_SESSION_BUS_ADDRESS=unix:path=/run/user/1000/bus -- npx -y @auth0/auth0-mcp-server run
You can also add it directly to ~/.codex/config.toml:
[mcp_servers.auth0]
command = "npx"
args = ["-y", "@auth0/auth0-mcp-server", "run"]
[mcp_servers.auth0.env]
DEBUG = "auth0-mcp"
DBUS_SESSION_BUS_ADDRESS = "unix:path=/run/user/1000/bus"
Restart Codex after updating the configuration.
Other MCP Clients
To use Auth0 MCP Server with any other MCP Client, you can manually add this configuration to the client and restart for changes to take effect:
{
"mcpServers": {
"auth0": {
"command": "npx",
"args": ["-y", "@auth0/auth0-mcp-server", "run"],
"capabilities": ["tools"],
"env": {
"DEBUG": "auth0-mcp"
}
}
}
}
You can add --tools '<pattern>' to the args array to control which tools are available. See Security Best Practices for recommended patterns.
The Auth0 MCP Server uses the Auth0 Management API and requires authentication to access your Auth0 tenant.
To authenticate the MCP Server:
npx @auth0/auth0-mcp-server init
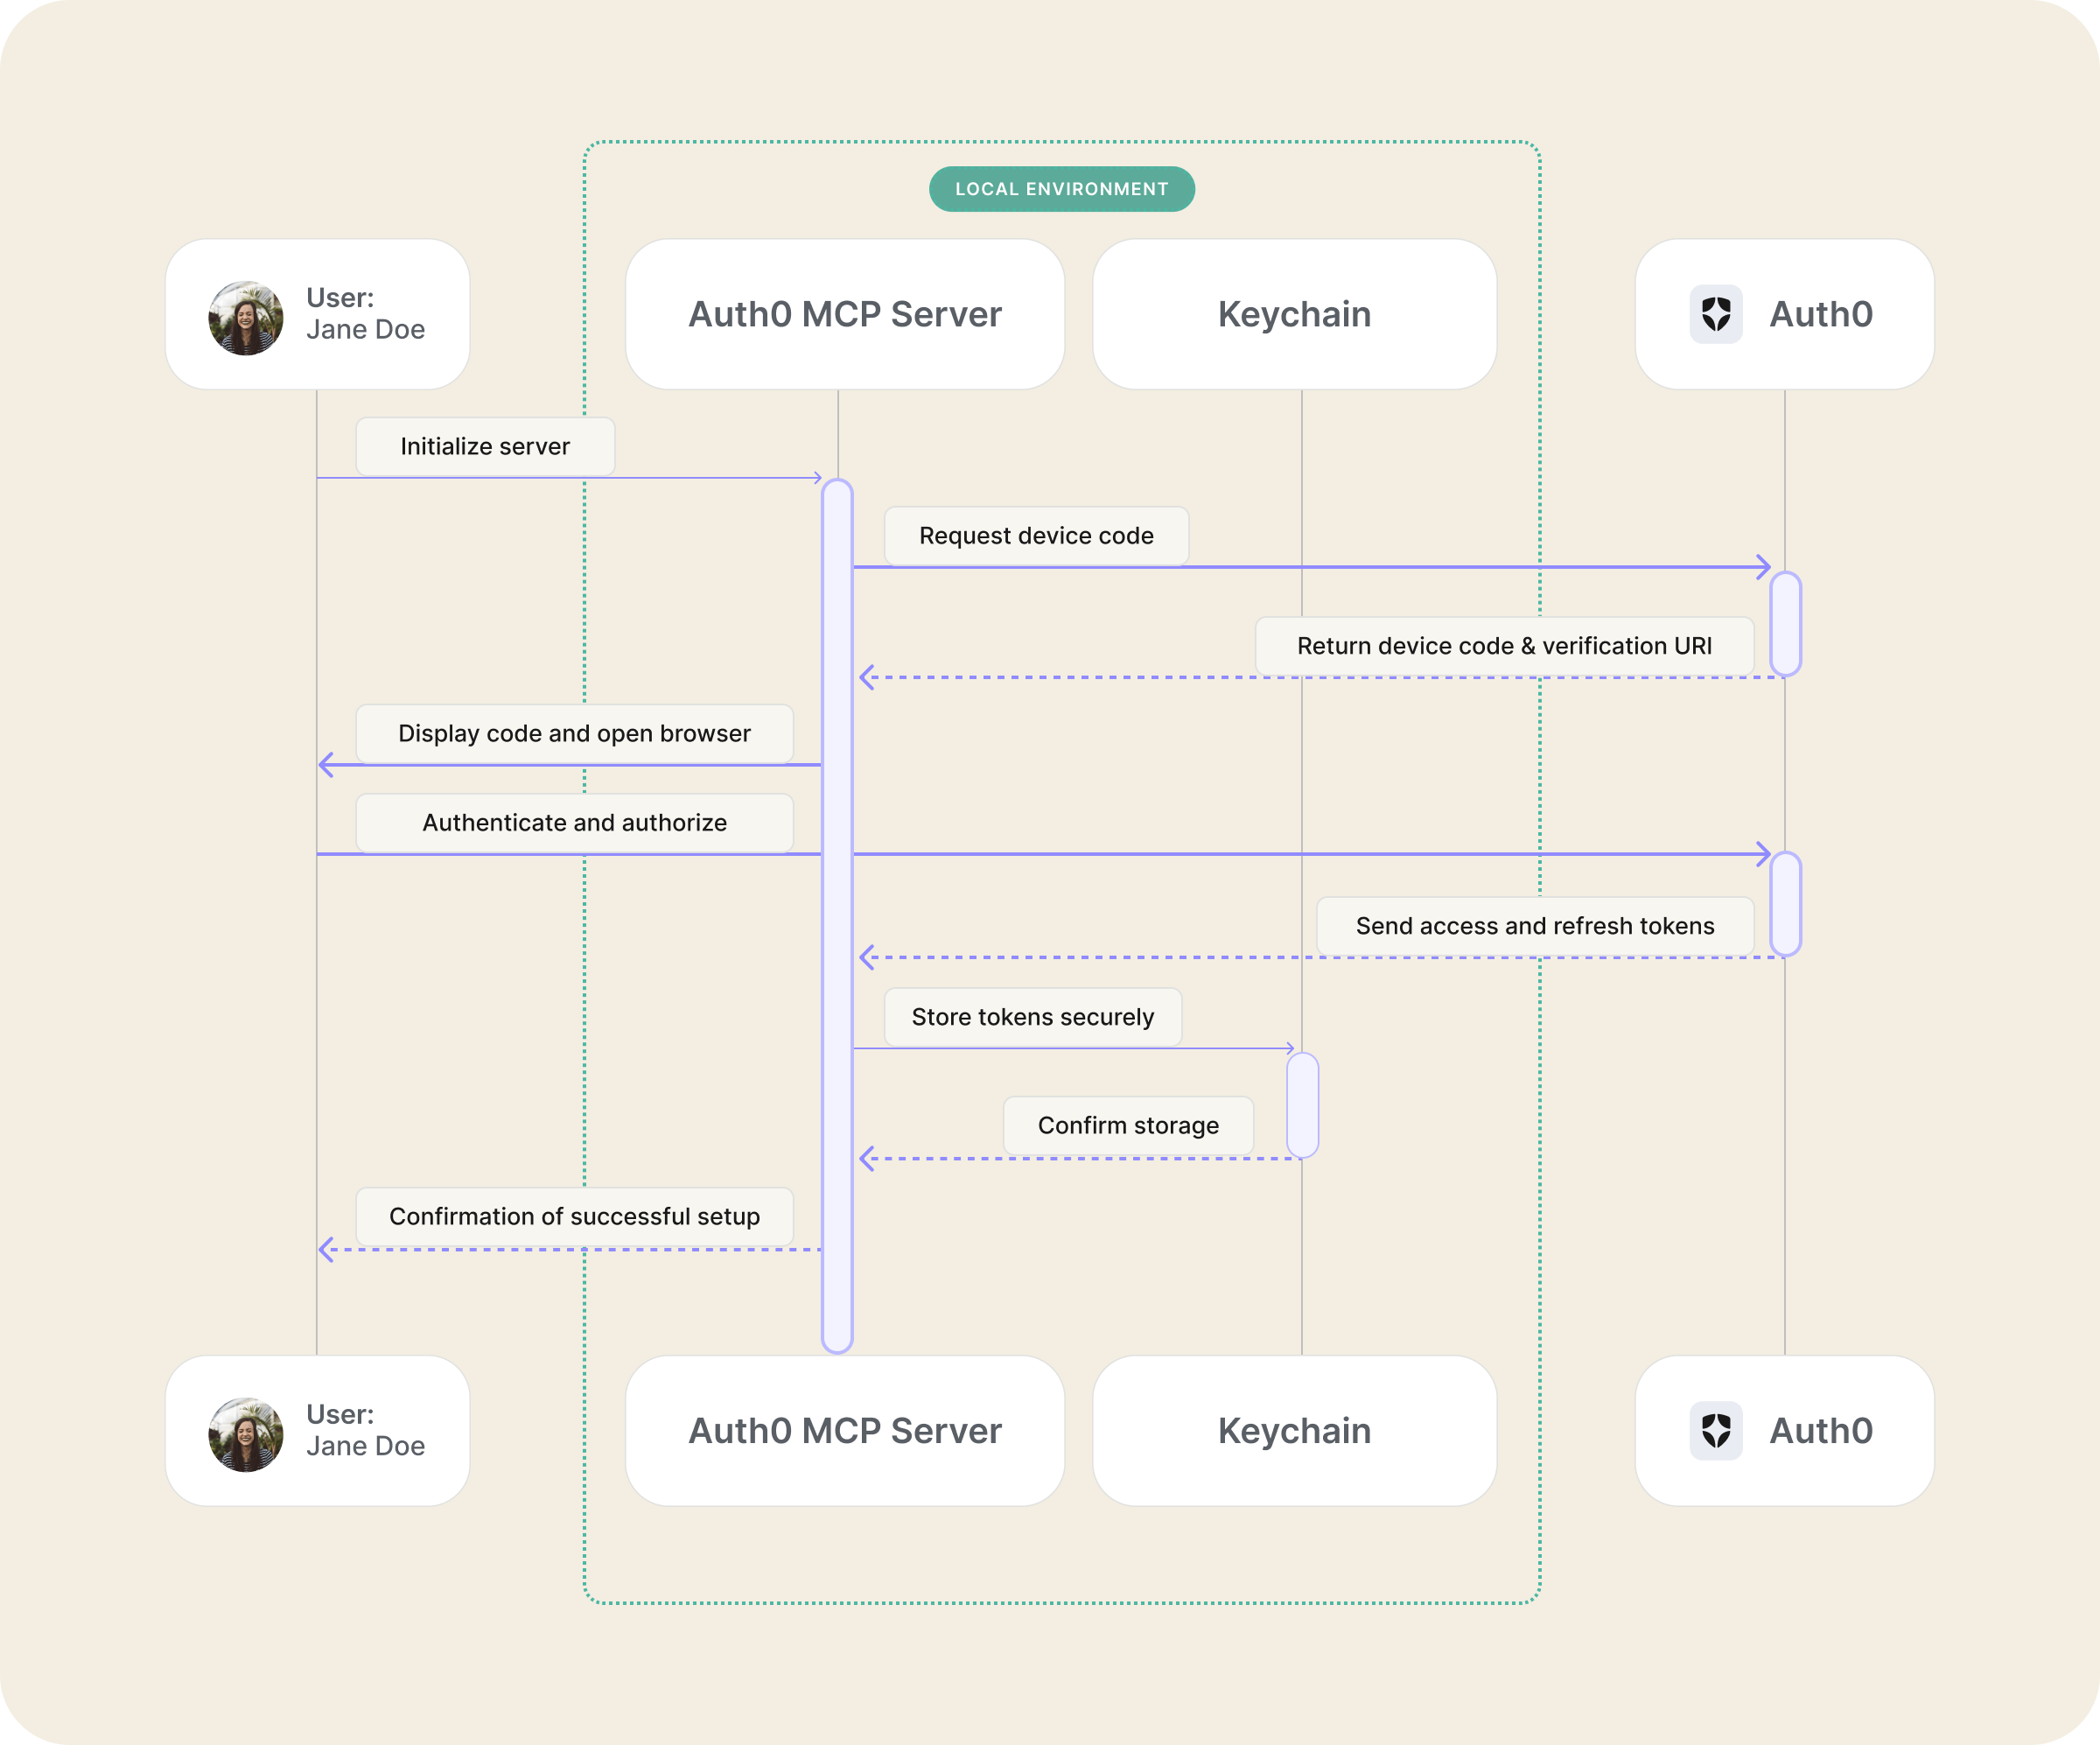
This will start the device authorization flow, allowing you to log in to your Auth0 account and select the tenant you want to use.
> [!NOTE]
> Authenticating using device authorization flow is not supported for private cloud tenants.
> Private Cloud users should authenticate with client credentials.Keep the token lifetime as minimal as possible to reduce security risks. See more
>
>
> npx @auth0/auth0-mcp-server init --auth0-domain <auth0-domain> --auth0-client-id <auth0-client-id> --auth0-client-secret <auth0-client-secret>
> > [!IMPORTANT]
>
> <details>
> <summary>Keep limited scope for client credentials M2M application:</summary>
>
> Supported scopes:
>
> - read:clients
> - create:clients
> - update:clients
> - read:resource_servers
> - create:resource_servers
> - update:resource_servers
> - read:actions
> - create:actions
> - update:actions
> - read:logs
> - read:forms
> - create:forms
> - update:forms
>
> </details>
> The init command needs to be run whenever:
>
> - You're setting up the MCP Server for the first time
> - You've logged out from a previous session
> - You want to switch to a different tenant
> - Your token has expired
>
> The run command will automatically check for token validity before starting the server and will provide helpful error messages if authentication is needed.
> [!NOTE]
> Using the MCP Server will consume Management API rate limits according to the subscription plan. Refer to the Rate Limit Policy for more information.
> [!TIP]
> Using the --no-interaction flag skips the user interaction (press return) to open the browser during setup. This can be useful if the MCP server is initiated in certain environments like an AI Agent.
The server uses OAuth 2.0 device authorization flow for secure authentication with Auth0. Your credentials are stored securely in your system's keychain and are never exposed in plain text.
<div align="center">
</div>
npm install
npm run setup
```
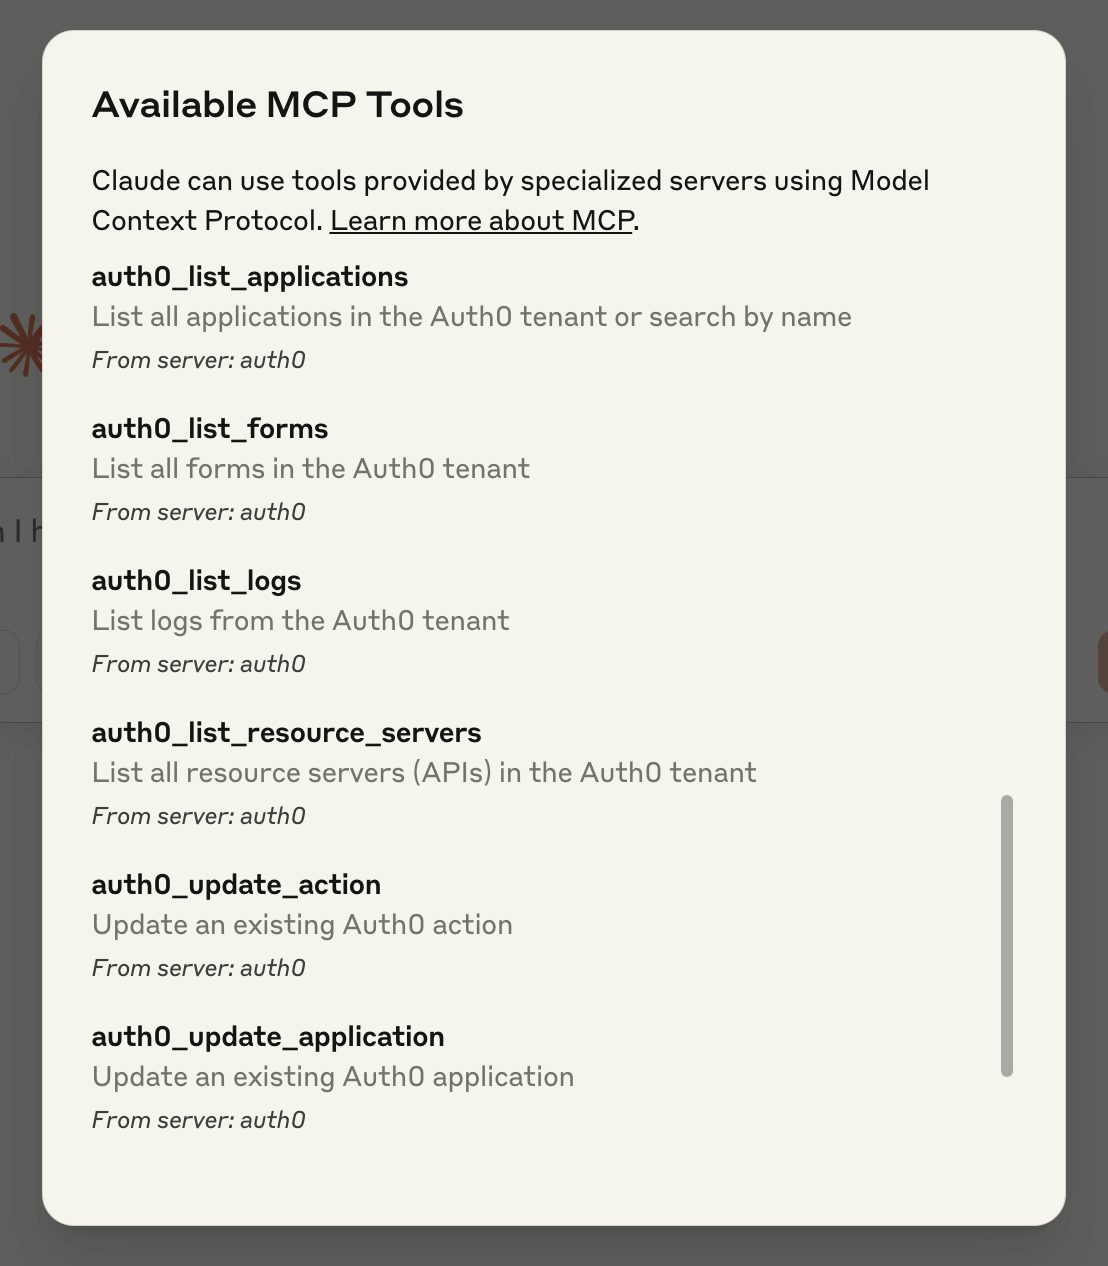
auth0_list_applications
List all applications in the Auth0 tenant or search by name. Usage Examples: 'Show me all my Auth0 applications', 'Find applications with 'api' in their name'.
auth0_get_application
Get details about a specific Auth0 application. Usage Examples: 'Show me details for the application called 'Customer Portal'', 'Get information about my application with client ID abc123'.
auth0_create_application
Create a new Auth0 application. Usage Examples: 'Create a new single-page application called 'Analytics Dashboard'', 'Set up a new native mobile app called 'iOS Client'.
auth0_update_application
Update an existing Auth0 application. Usage Examples: 'Update the callback URLs for my 'Web App'', 'Change the logout URL for the 'Customer Portal''.
auth0_save_credentials_to_file
Save an application's credentials as environment variables to a project's .env file (and add it to .gitignore). Usage Examples: 'Save my app's Auth0 credentials to a .env file in this project'.
auth0_onboarding
Onboard a project with Auth0: creates an application configured for the given framework and saves credentials to a .env file. Usage Examples: 'Onboard my Next.js project with Auth0'.
auth0_get_quickstart_guide
Fetch the framework quickstart prompt, resolve and update callback URLs, and return code to integrate the Auth0 SDK. Usage Examples: 'Show me how to add the Auth0 SDK to my Next.js app'.
auth0_list_resource_servers
List all resource servers (APIs) in the Auth0 tenant. Usage Examples: 'Show me all the APIs in my Auth0 tenant'.
auth0_get_resource_server
Get details about a specific Auth0 resource server. Usage Examples: 'Show me details for the 'User API''.
auth0_create_resource_server
Create a new Auth0 resource server (API). Usage Examples: 'Create a new API called 'Inventory API' with read and write scopes'.
auth0_update_resource_server
Update an existing Auth0 resource server. Usage Examples: 'Add an 'admin' scope to the 'User API''.
auth0_create_application_grant
Create a client grant that authorizes an Auth0 application to access a specific API with defined scopes. Usage Examples: 'Grant my 'Backend Service' application access to the 'User API''.
auth0_list_actions
List all actions in the Auth0 tenant. Usage Examples: 'Show me all my Auth0 actions'.
auth0_get_action
Get details about a specific Auth0 action. Usage Examples: 'Show me the code for my 'Enrich User Profile' action'.
auth0_create_action
Create a new Auth0 action. Usage Examples: 'Create an action that adds user roles to tokens'.
auth0_update_action
Update an existing Auth0 action. Usage Examples: 'Update my 'Add Custom Claims' action to include department information'.
auth0_deploy_action
Deploy an Auth0 action. Usage Examples: 'Deploy my 'Add Custom Claims' action to production'.
auth0_list_logs
List logs from the Auth0 tenant. Usage Examples: 'Show me recent login attempts'.
auth0_get_log
Get a specific log entry by ID. Usage Examples: 'Show me details for log entry abc123'.
auth0_list_forms
List all forms in the Auth0 tenant. Usage Examples: 'Show me all my Auth0 forms'.
auth0_get_form
Get details about a specific Auth0 form. Usage Examples: 'Show me the details of my 'Corporate Login' form'.
auth0_create_form
Create a new Auth0 form. Usage Examples: 'Create a new login form with our company branding'.
auth0_update_form
Update an existing Auth0 form. Usage Examples: 'Update the colors on our login form to match our new brand guidelines'.
auth0_publish_form
Publish an Auth0 form. Usage Examples: 'Publish my updated login form'.
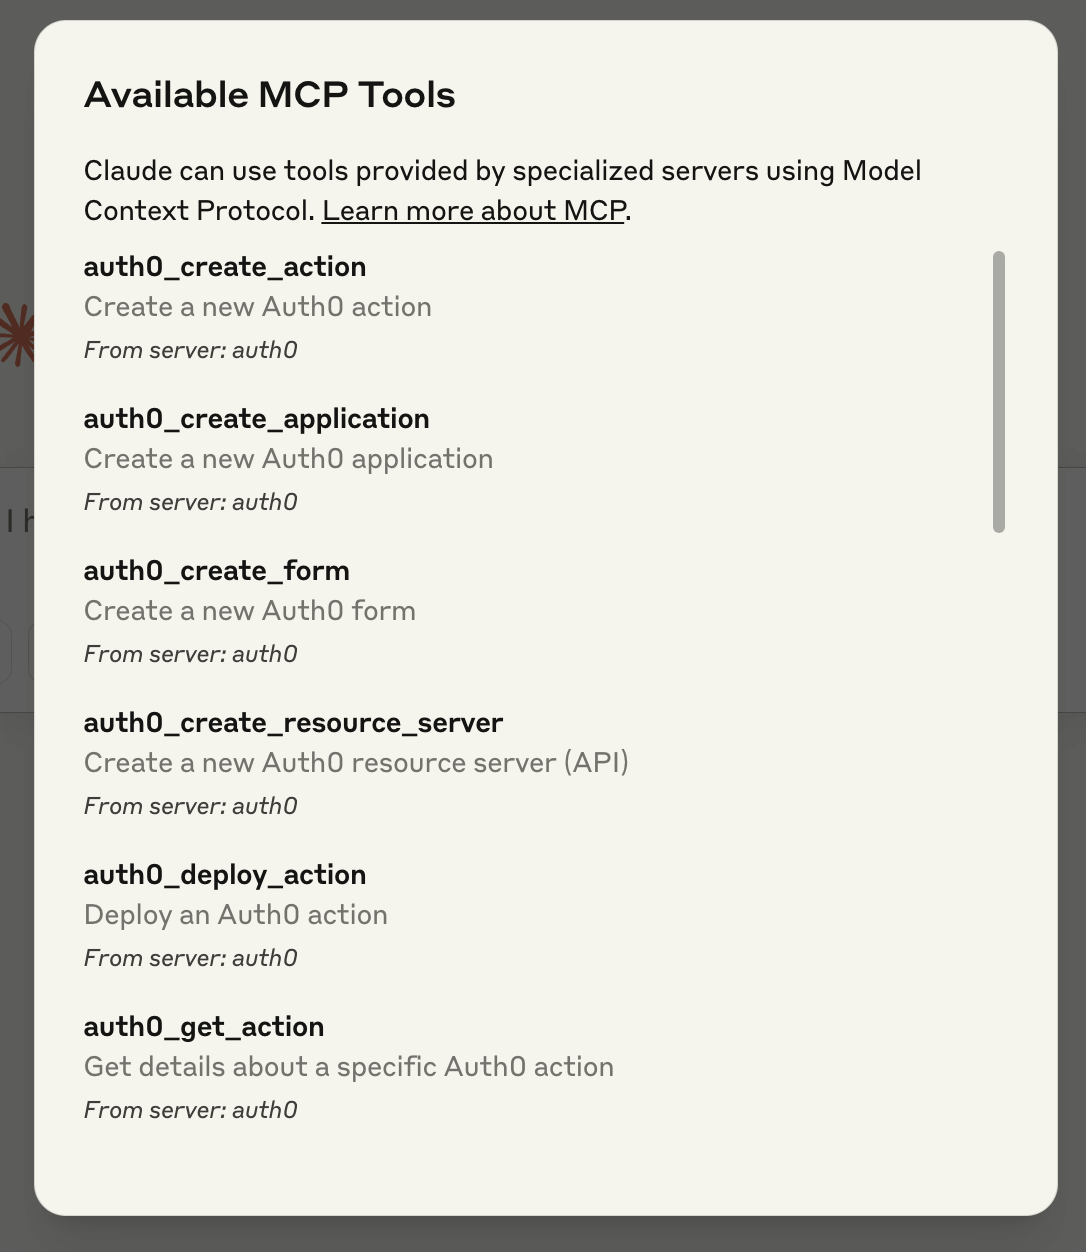
The Auth0 MCP Server provides the following tools for Claude to interact with your Auth0 tenant:
<div align="center" style="display: flex; justify-content: center; gap: 20px;">
</div>
When configuring the Auth0 MCP Server, it's important to follow security best practices by limiting tool access based on your specific needs. The server provides flexible configuration options that let you control which tools AI assistants can access.
You can easily restrict tool access using the --tools and --read-only flags when starting the server:
npx @auth0/auth0-mcp-server run --tools 'auth0__application'
npx @auth0/auth0-mcp-server run --tools 'auth0__application' --read-only
npx @auth0/auth0-mcp-server run --tools ''
> [!IMPORTANT]
> When both --read-only and --tools flags are used together, the --read-only flag takes priority for security. This means even if your --tools pattern matches non-read-only tools, only read-only operations will be available. This ensures you can rely on the --read-only flag as a security guardrail.
For environments where CLI flags cannot be passed through (for example, MCP bundle installs), the same controls are available as environment variables:
| Variable | Equivalent flag | Example |
| --------------------- | --------------- | ------------------------------------------ |
| AUTH0_MCP_READ_ONLY | --read-only | AUTH0_MCP_READ_ONLY=true |
| AUTH0_MCP_TOOLS | --tools | AUTH0_MCP_TOOLS=auth0_list_,auth0_get_* |
CLI flags take precedence when both are provided.
This approach offers several important benefits:
1. Enhanced Security: By limiting available tools to only what's needed, you reduce the potential attack surface and prevent unintended modifications to your Auth0 tenant.
2. Better Performance: Providing fewer tools to AI assistants actually improves performance. When models have access to many tools, they use more of their context window to reason about which tools to use. With a focused set of tools, you'll get faster and more relevant responses.
3. Resource-Based Access Control: You can configure different instances of the MCP server with different tool sets based on specific needs - development environments might need full access, while production environments could be limited to read operations only.
4. Simplified Auditing: With limited tools, it's easier to track which operations were performed through the AI assistant.
For most use cases, start with the minimum set of tools needed and add more only when required. This follows the principle of least privilege - a fundamental security best practice.
Claude Desktop / Cursor
Paste into your MCP client config file to install this server.
{
    "mcpServers": {
        "auth0": {
            "env": {
                "DEBUG": "auth0-mcp"
            },
            "args": [
                "-y",
                "@auth0/auth0-mcp-server",
                "run"
            ],
            "command": "npx"
        }
    }
}Linux
{
    "env": {
        "DEBUG": "auth0-mcp"
    },
    "args": [
        "-y",
        "@auth0/auth0-mcp-server",
        "run"
    ],
    "command": "npx"
}
Macos
{
    "env": {
        "DEBUG": "auth0-mcp"
    },
    "args": [
        "-y",
        "@auth0/auth0-mcp-server",
        "run"
    ],
    "command": "npx"
}
Windows
{
    "env": {
        "DEBUG": "auth0-mcp"
    },
    "args": [
        "/c",
        "npx",
        "-y",
        "@auth0/auth0-mcp-server",
        "run"
    ],
    "command": "cmd"
}
What is Auth0?
<p align="center">
<picture>
<source media="(prefers-color-scheme: dark)" srcset="https://cdn.auth0.com/website/auth0-logos/2023-branding/favicon/auth0-icon-ondark.svg" width="150" height="75">
<source media="(prefers-color-scheme: light)" srcset="https://cdn.auth0.com/website/auth0-logos/2023-branding/favicon/auth0-icon-onlight.svg" width="150" height="75">

</picture>
</p>
<p align="center">
Auth0 is an easy to implement, adaptable authentication and authorization platform. To learn more checkout <a href="https://auth0.com/why-auth0">Why Auth0?</a>
</p>
Sign in to leave a review
Use Google, GitHub, or an email account so ratings stay tied to real people.
No reviews posted yet.