Ollama Pydantic Project
About
Created sample project for pydantic agent with local ollama model with mcp server integration.
Explore
- Streamlit Chatbot: A user-friendly chatbot interface.
- Ollama Model Integration: Uses a local Ollama model for generating responses.
- MCP Server Tools: Connects to an MCP server to enhance agent capabilities.
- Pydantic Framework: Ensures data validation and type safety.

Setting up with Highlight
This MCP is not yet compatible with Highlight’s one-click setup. However, you can still use it with Highlight by following these steps:
- Download and install Highlight from highlightai.com/download
- Navigate to the plugins tab and select "Add Custom Plugin"
-
Configure the plugin with the settings below
Plugin Name
Ollama Pydantic ProjectCommand (node, npx, python, etc.)Please refer to the README for specific instructions on how to obtain API keys or other required environment variables.
- Enable "Start Automatically" if you want the plugin to start when Highlight launches





From the repository
Before setting up the project, ensure the following:
1. Python: Install Python 3.8 or higher. You can download it from python.org.
2. Ollama Model: Install and run the Ollama server locally:
- Download the Ollama CLI from Ollama's official website.
- Install the CLI by following the instructions provided on their website.
- Start the Ollama server:
ollama serve
- Ensure the server is running on
http://localhost:11434/v1.3. MCP Server: Set up an MCP server to enable agent tools. For more details, refer to MCP Server Sample.
Follow these steps to set up the project:
1. Clone the Repository:
git clone <repository-url>
cd ollama-pydantic-project
2. Create a Virtual Environment:
python3 -m venv venv
3. Activate the Virtual Environment:
- On macOS/Linux:
source venv/bin/activate
- On Windows:
venv\Scripts\activate
4. Install Dependencies:
pip install -r requirements.txt
5. Ensure the Ollama Server is Running:
Start the Ollama server as described in the prerequisites.
6. Run the Application:
Start the Streamlit application:
streamlit run src/streamlit_app.py
Claude Desktop / Cursor
Paste into your MCP client config file to install this server.
{
    "mcpServers": {
        "ollama pydantic project": {
            "ollama-pydantic-project": {
                "command": "python3",
                "args": [
                    "-m",
                    "venv",
                    "venv"
                ]
            }
        }
    }
}McpServers
{
"ollama-pydantic-project": {
"command": "python3",
"args": [
"-m",
"venv",
"venv"
]
}
}This project demonstrates how to use a local Ollama model with the Pydantic agent framework to create an intelligent agent. The agent is connected to an MCP server to utilize tools and provides a user-friendly interface using Streamlit.
Overview
The main goal of this project is to showcase:
- Local Ollama Model Integration: Using a locally hosted Ollama model for generating responses.
- Pydantic Agent Framework: Creating an agent with Pydantic for data validation and interaction.
- MCP Server Connection: Enabling the agent to use tools via an MCP server.
- Streamlit UI: Providing a web-based chatbot interface for user interaction.
Prerequisites
Before setting up the project, ensure the following:
1. Python: Install Python 3.8 or higher. You can download it from python.org.
2. Ollama Model: Install and run the Ollama server locally:
- Download the Ollama CLI from Ollama's official website.
- Install the CLI by following the instructions provided on their website.
- Start the Ollama server:
ollama serve
- Ensure the server is running on
http://localhost:11434/v1.3. MCP Server: Set up an MCP server to enable agent tools. For more details, refer to MCP Server Sample.
Setup Instructions
Follow these steps to set up the project:
1. Clone the Repository:
   git clone <repository-url>

   cd ollama-pydantic-project
2. Create a Virtual Environment:
python3 -m venv venv
3. Activate the Virtual Environment:
- On macOS/Linux:
source venv/bin/activate
- On Windows:
venv\Scripts\activate
4. Install Dependencies:
pip install -r requirements.txt
5. Ensure the Ollama Server is Running:
Start the Ollama server as described in the prerequisites.
6. Run the Application:
Start the Streamlit application:
streamlit run src/streamlit_app.py
Usage
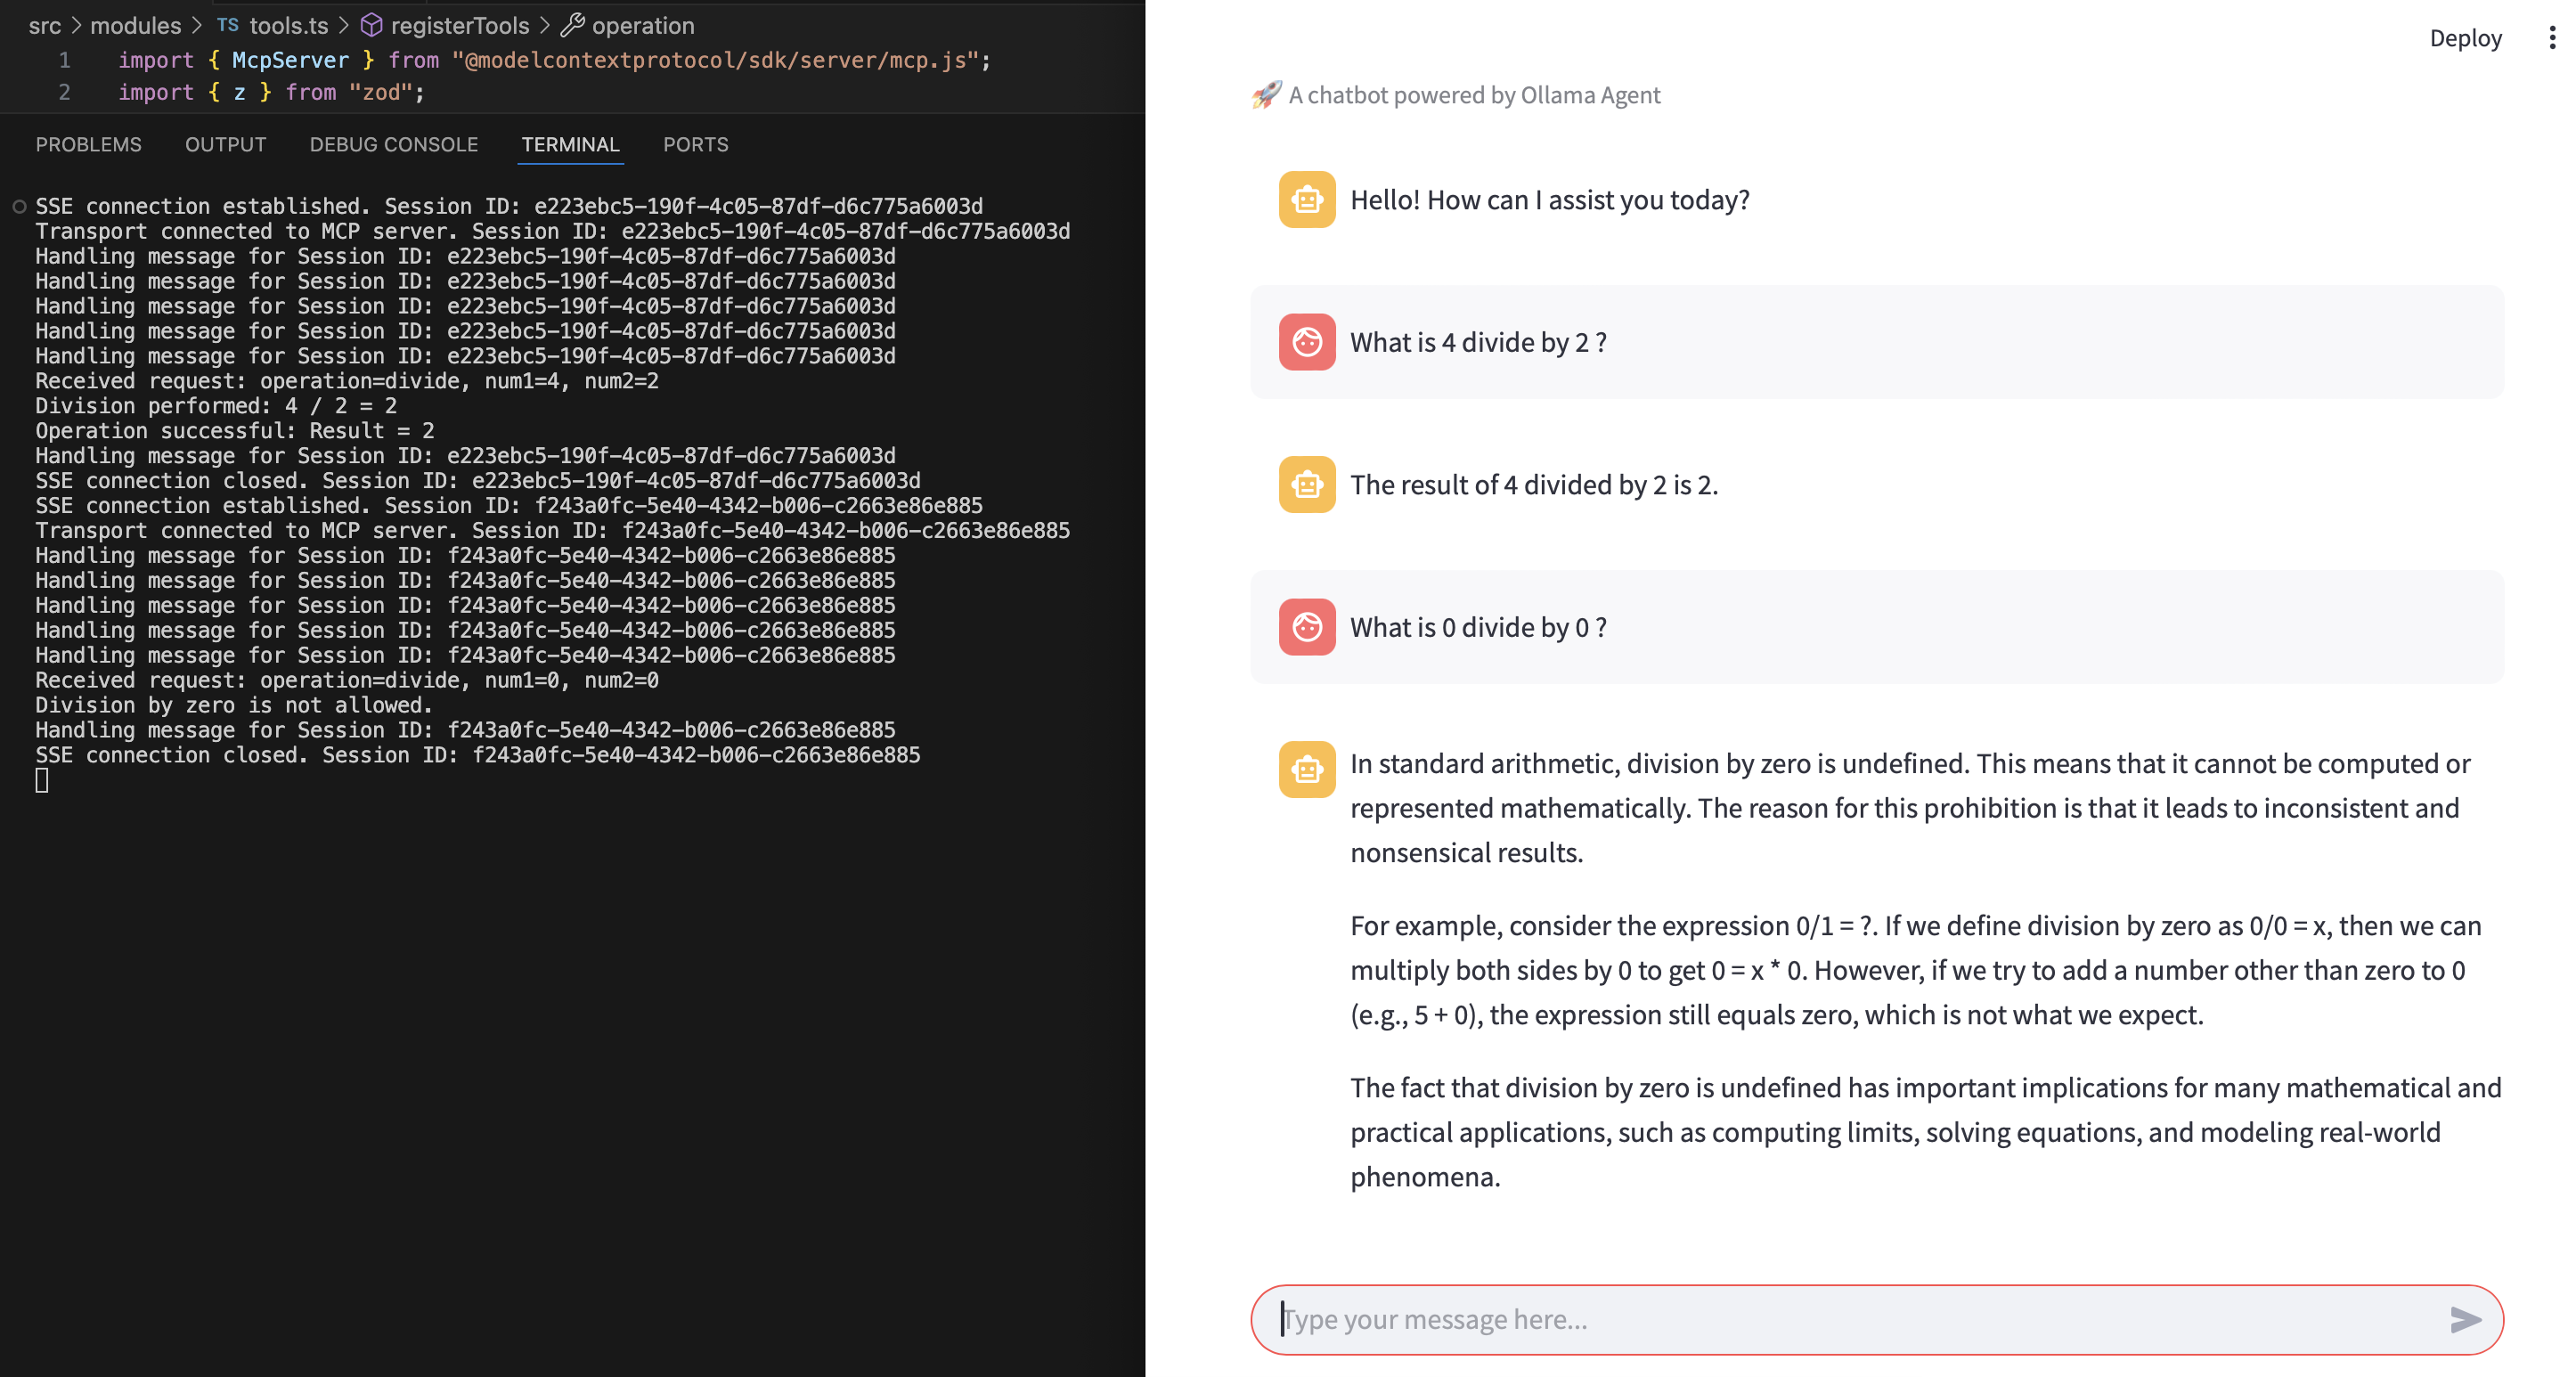
Once the application is running, open the provided URL in your browser (usually http://localhost:8501). You can interact with the chatbot by typing your queries in the input box. The agent will process your queries using the Ollama model and tools provided by the MCP server.
Example Interaction
Below is an example of how the chatbot interface looks when interacting with the agent:
Project Structure
The project is organized as follows:
ollama-pydantic-project/
├── src/
│   ├── streamlit_app.py        # Main Streamlit application
│   ├── agents/
│   │   ├── base_agent.py       # Abstract base class for agents
│   │   ├── ollama_agent.py     # Implementation of the Ollama agent
│   ├── utils/
│       ├── config.py           # Configuration settings
│       ├── logger.py           # Logger utility
├── requirements.txt            # Python dependencies
├── README.md                   # Project documentation
├── assets/
│   ├── ollama_agent_mcp_example.png  # Example interaction image
├── .gitignore                  # Git ignore file
Features
- Streamlit Chatbot: A user-friendly chatbot interface.
- Ollama Model Integration: Uses a local Ollama model for generating responses.
- MCP Server Tools: Connects to an MCP server to enhance agent capabilities.
- Pydantic Framework: Ensures data validation and type safety.
Troubleshooting
- If you encounter issues with the Ollama server, ensure it is running on http://localhost:11434/v1.
- If dependencies fail to install, ensure you are using Python 3.8 or higher and that your virtual environment is activated.
- For MCP server-related issues, refer to the MCP Server Sample.
License
This project is licensed under the MIT License. See the LICENSE file for details.
Contributing
Contributions are welcome! Feel free to open issues or submit pull requests.
Sign in to leave a review
Use Google, GitHub, or an email account so ratings stay tied to real people.
No reviews posted yet.